Code anywhere with Codespaces
The dream of anyone working in technology is to always have their best friend, their computer, with them. There are many solutions that transform small devices like Raspberry Pis into complete computers, and others create pocket-sized computers that can be accessed at any time.
There are many reasons why someone might need (or just want) to have a computer by their side all the time. Often people prefer to have a powerful tool always at hand for any problems that arise, or even to develop an idea that struck them in the middle of the street. In more special cases, someone might be a maintainer of critical projects and needs to be ready to solve any issues that come up, which takes away their freedom of movement. Having a device like this allows them to regain their mobility.
We can have the best portable machines, but no computer compares to our own, with our environments and our configurations.
Codespaces#
Recently, at its Satellite 2020 event, GitHub announced a new platform feature: Codespaces. Right now, it’s available only by requesting early access through their website. But you might be one of the people who recently got access and can use this amazing feature!
For now, GitHub Codespaces is in beta and you might not have the feature enabled. So you won’t be able to see what I’ll show next, but you can sign up directly on the website to get early access.
Codespaces are an online implementation of Visual Studio Code. Because it’s an editor built on web technologies, VS Code has the amazing ability to be one of the few projects that can be ported between platforms very easily.
This had been done before with Code Server. We even used an interesting implementation created by Alejandro Oviedo, our colleague from Argentina, at Nodeschool SP. But one of the big problems with Code Server was that the extension marketplace didn’t support all the extensions available for VS Code, and the editor would also get confused when we used keyboards with different layouts.
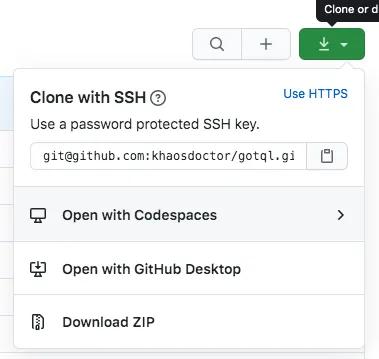
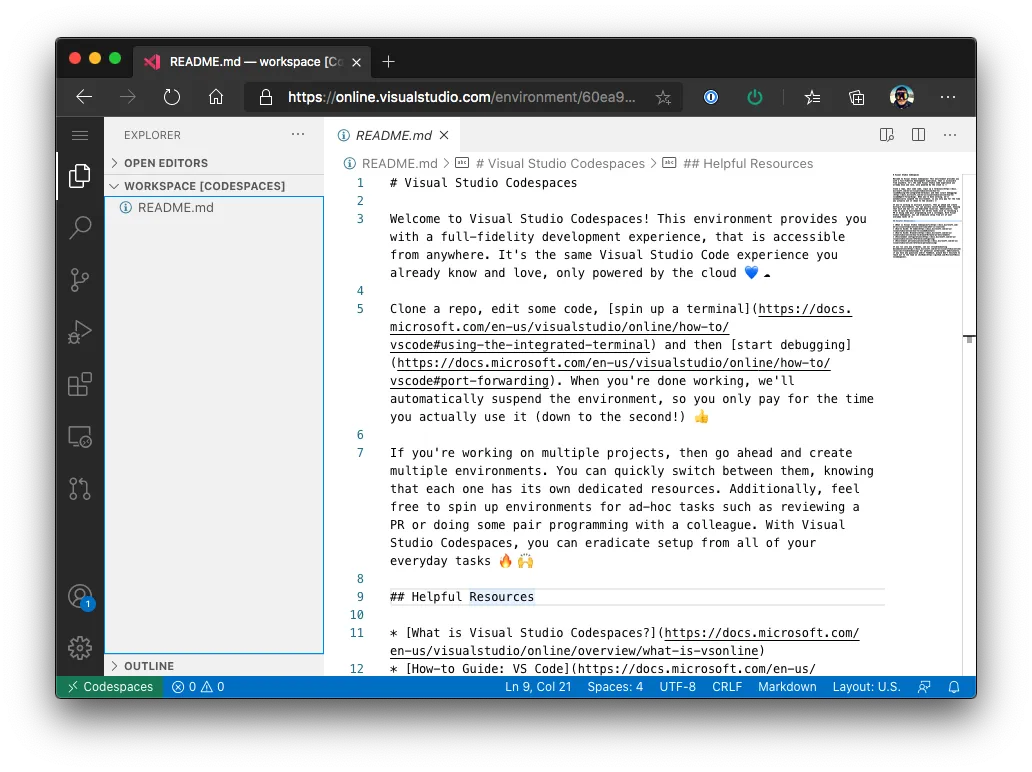
The big advantage that GitHub Codespaces (GH Codespaces or GHC) brought is that it integrates directly with GitHub, which means you can open any repository you have write permission on in a ready-to-use web editor! Check out an example with my GotQL repository:
And all of this is free, whether for paid or private repositories.
How it works#
Codespaces are built on top of another existing Microsoft solution called Visual Studio Codespaces (VSC), which is an excellent paid alternative to GH Codespaces when you’re looking for something more open. That’s because VS Codespaces create a virtual machine on Azure and connect to it through VS Code’s native feature called Remote Development.
Remote Development connects to another computer running a small server on the other end. In other words, you can separate the editor’s processing from its interface. That way you can practically run VS Code anywhere, because any browser that supports recent JavaScript can run the editor’s interface.
And then we add another amazing technology: containers. As you may have already seen right here on the blog, containers are an incredible technology that lets you run practically any application in a self-contained way without depending on external libraries. Codespaces take many advantages from this, especially for building the images for the machines that will run.
That way we can have a container that contains all the tools needed for our project to run, because it’s fully customizable.
Visual Studio Codespaces#

Before diving into GitHub Codespaces, I’ll show you how we can use VS Codespaces to create a remote development environment so we can understand what we’re working with.
After logging in and creating your VS Codespaces instance, let’s create a new codespace:
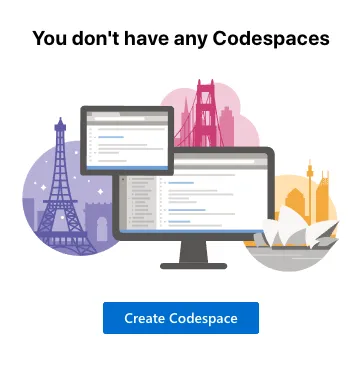
And once we click the “Create Codespace” button, things start to get interesting, because we get a series of amazing options that can be enabled:
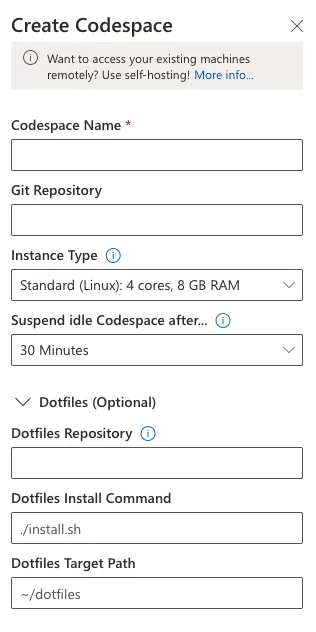
The first option is straightforward. We need to give our codespace a name, which is how we’ll identify this machine, so it needs to be a descriptive name.
Next, we have the most interesting option. VS Codespaces already lets us start a Codespace from another GitHub repository, which means GH Codespaces is essentially a different interface for VS Codespaces.
From there, we have VM configuration options, so we can choose how powerful our remote machine will be and also how much idle time it can have before suspending to avoid costs.
And then comes the best part! We can define what are called dotfiles, which are shell configuration files. That way, we can have a separate dotfiles repository (like I do) and a script to install these dotfiles on our online machine. In other words, we can replicate exactly what we have on our local computer in a web interface!
GitHub Codespaces#
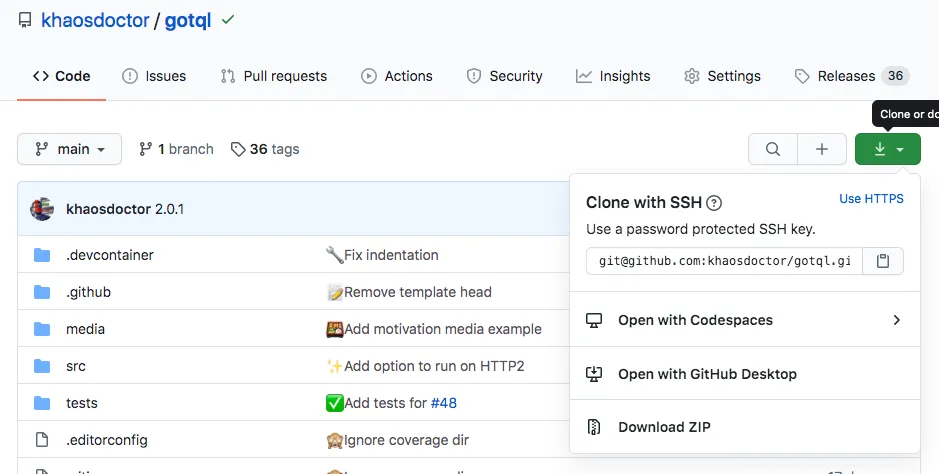
With GHC it’s exactly the same! The only different action you need to do is go to a repository (like GotQL), click the green button that says “clone”, and then click “open with codespace”:
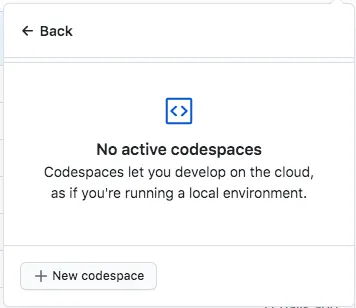
All beta users get 2 free codespaces. That means you can have up to 2 development machines without paying anything. After that, you’ll need to remove old ones to create new ones. In the GotQL example, we have the option to open with Codespaces, and this action already creates an environment ready for development, with all dependencies installed.
But how do we do that?
Customization#
One of the coolest features of codespaces is that they’re fully customizable.
For dotfiles, you can configure your local VS Code (the editor installed on your machine) to fetch a set of files as this documentation explains, or with GitHub, you can have a repository directly called dotfiles, as GitHub’s documentation explains.
But you can do more than that with a folder called .devcontainer. What this folder does is group all the possible configurations for a codespace. In it, we can have a Dockerfile, a file called devcontainer.json, and a shell script file for configuring our environment’s shell. When we create a codespace from a repository, GitHub will look for this folder and create the codespace according to it.
Let’s look at the .devcontainer example from GotQL. We have a Dockerfile, which is responsible for specifying what type of container or environment we’ll have. This is where we install packages, create users, and so on. It’s also where we choose the image for our base operating system.
FROM mcr.microsoft.com/vscode/devcontainers/javascript-node:14
# The javascript-node image includes a non-root node user with sudo access. Use# the "remoteUser" property in devcontainer.json to use it. On Linux, the container# user's GID/UIDs will be updated to match your local UID/GID when using the image# or dockerFile property. Update USER_UID/USER_GID below if you are using the# dockerComposeFile property or want the image itself to start with different ID# values. See https://aka.ms/vscode-remote/containers/non-root-user for details.ARG USERNAME=nodeARG USER_UID=1000ARG USER_GID=$USER_UID
# Alter node user as needed, install tslint, typescript. eslint is installed by javascript imageRUN if [ "$USER_GID" != "1000" ] || [ "$USER_UID" != "1000" ]; then \ groupmod --gid $USER_GID $USERNAME \ && usermod --uid $USER_UID --gid $USER_GID $USERNAME \ && chmod -R $USER_UID:$USER_GID /home/$USERNAME \ && chmod -R $USER_UID:root /usr/local/share/nvm /usr/local/share/npm-global; \ fi \ # # Install tslint, typescript. eslint is installed by javascript image && sudo -u ${USERNAME} npm install -g tslint typescript gitmoji-cliSo when a GotQL codespace is created, that’s the environment we’ll have, an environment with a non-root user with sudo access and tslint and TypeScript already installed. I also added gitmoji-cli, which is the commit convention I use for this project.
Next, we have the devcontainer.json file, which is responsible not only for setting our editor’s configurations but also for giving directions to the codespace builder. In it we define the codespace name, the extensions our online VS Code will have as soon as it starts, which Dockerfile it needs to use to build the system base, and we can also override VS Code’s own settings.
{ "name": "TypeScript website codespace", "extensions": [ "emmanuelbeziat.vscode-great-icons", "dbaeumer.vscode-eslint", "oderwat.indent-rainbow", "vtrois.gitmoji-vscode", "dracula-theme.theme-dracula", "2gua.rainbow-brackets", "ms-vscode.vscode-typescript-tslint-plugin" ], "dockerFile": "Dockerfile", // Set *default* container specific settings.json values on container create. "settings": { "terminal.integrated.shell.linux": "/bin/bash", "window.autoDetectColorScheme": true, "workbench.preferredDarkColorTheme": "Dracula", "editor.renderWhitespace": "boundary", "workbench.colorTheme": "Dracula", "workbench.iconTheme": "vscode-great-icons" }, // Use 'postCreateCommand' to run commands after the container is created. "postCreateCommand": "npm install"}We also have the addition of a postCreateCommand, which is extremely useful for running commands after the codespace is created. In this case we’re running the npm install command, so all the packages will already be installed when we open it.
We also have an excellent repository of examples of codespaces that can serve as a base for you to create your own. Let’s look at the setup.sh file from the Node codespace example.
## update and install some things we should probably haveapt-get updateapt-get install -y \ curl \ git \ gnupg2 \ jq \ sudo \ zsh
## set-up and install yarncurl -sS https://dl.yarnpkg.com/debian/pubkey.gpg | apt-key add -echo "deb https://dl.yarnpkg.com/debian/ stable main" | tee /etc/apt/sources.list.d/yarn.listapt-get update && apt-get install yarn -y
## install nvmcurl -o- https://raw.githubusercontent.com/nvm-sh/nvm/v0.35.3/install.sh | bash
## setup and install oh-my-zshsh -c "$(curl -fsSL https://raw.githubusercontent.com/robbyrussell/oh-my-zsh/master/tools/install.sh)"cp -R /root/.oh-my-zsh /home/$USERNAMEcp /root/.zshrc /home/$USERNAMEsed -i -e "s/\/root\/.oh-my-zsh/\/home\/$USERNAME\/.oh-my-zsh/g" /home/$USERNAME/.zshrcchown -R $USER_UID:$USER_GID /home/$USERNAME/.oh-my-zsh /home/$USERNAME/.zshrcThis file is referenced inside the Dockerfile and runs as soon as it starts.
Conclusion#
Codespaces could become one of the main technologies we have today, especially because they allow editing or even more complex development using mobile devices like smartphones.
Many programmers were already using Docker-based solutions to code on iPad, but these solutions always ended up being more like workarounds than actual solutions.
With the emergence of technologies and features like these, we have the ability to take our work environment anywhere. Stay tuned for upcoming articles where I’ll explain how I set up my remote work environment using GHC!
See you!