Meet GitHub Container Registry
Some time ago, GitHub announced they were creating GitHub Packages. This was yet another tool from this incredible network to make developers’ lives even easier.
You can access packages through your own profile, and there you’ll see a range of options, from NPM packages to, more recently, Docker images.
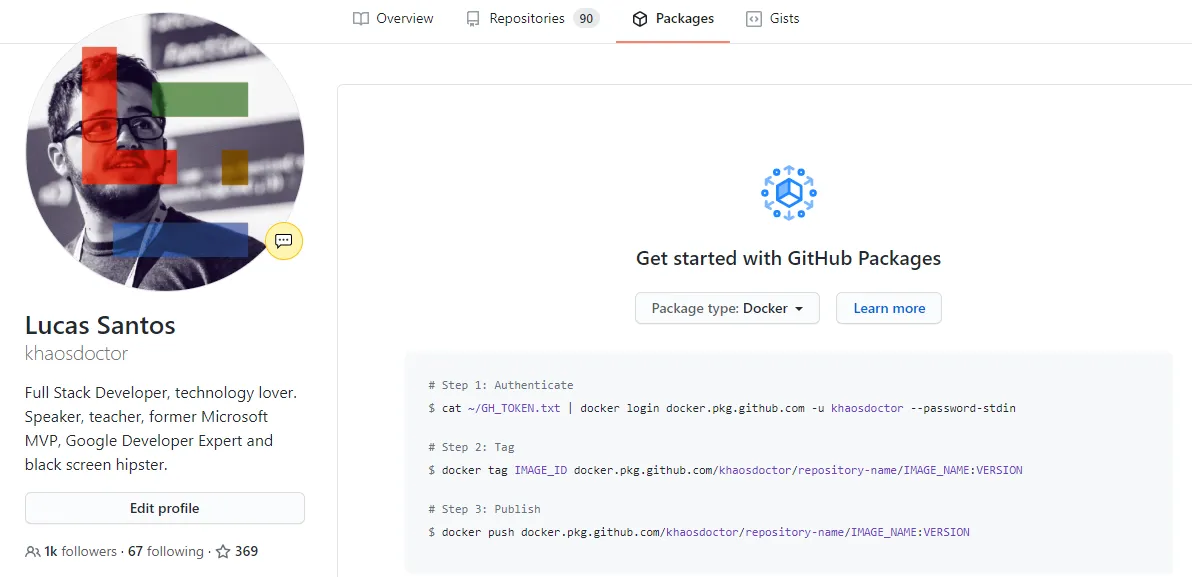
That’s right! Now, in addition to Docker Hub, you can also store your images directly on GitHub, but what does this change?
GitHub Container Registry#
GH Container Registry is a way for you to unite your code with the image it represents, in other words, to keep the infrastructure and code itself in the same environment.
This makes things much easier when you need to direct a user to a downloads page, or to let them know they can also download a container image directly from your own profile!
Initially, this tool was in closed beta, but on September 1st, the team released an open beta for all users to test the new packages model.
Pricing#
Compared to Docker Hub, which doesn’t charge for public repositories but does for private ones, GH Container Registry works the same way. When this feature reaches its public version, the famous GA (General Availability), the cost for public images will be zero, while private images will have a separate cost.
For now, however, during the entire beta, both public and private packages will be free. So take advantage and do that test by putting your images there!
But wait a moment… How do we do this?
Creating an image#
Creating and storing an image in GitHub’s registry is quite straightforward. We can do it in two ways.
Via Docker#
We can log in to GitHub with our local Docker and push the image to the registry, the same way we log in to other private registries, such as ACR.
To do this, we’ll follow these commands:
- Run the login in your preferred terminal:
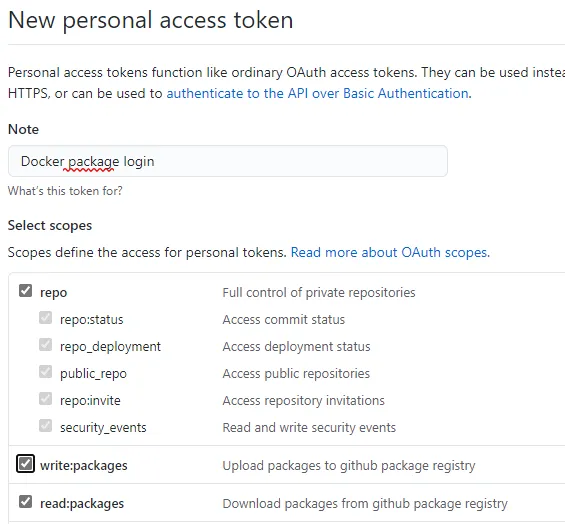
docker login docker.pkg.github.com -u <usuario do github>- The prompt will ask for your password. You’ll need to generate a new access token on this page
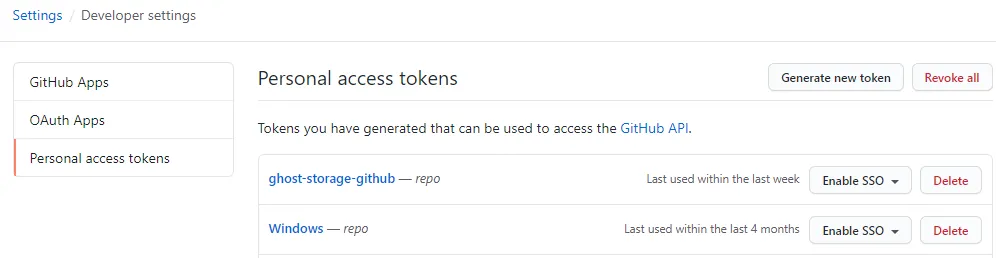
It’s important that the token has write and read permissions for packages
-
Use this generated token as the password to log in
-
Push any image using
docker push docker.pkg.github.com/username/repositório/nome-da-imagem:tag
Via GitHub Actions#
We’ve already discussed in another article how we can automate a range of things using GH Actions. So how can we use actions to push our images to GitHub’s CR?
For this example I’ll use a repository I maintain, called Zaqar. This is because this project is inherently a microservice and requires Docker to run, so we can use it in a more real-world way.
First I’ll create a new access token so I can use it as my password in our action
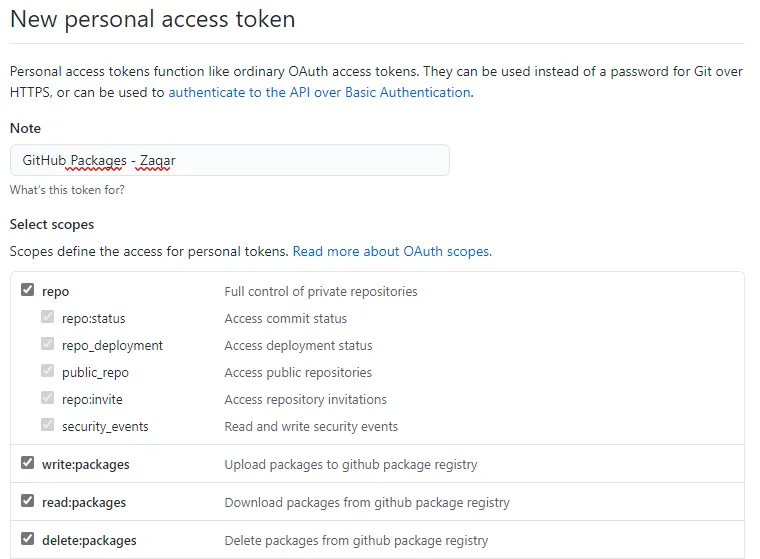
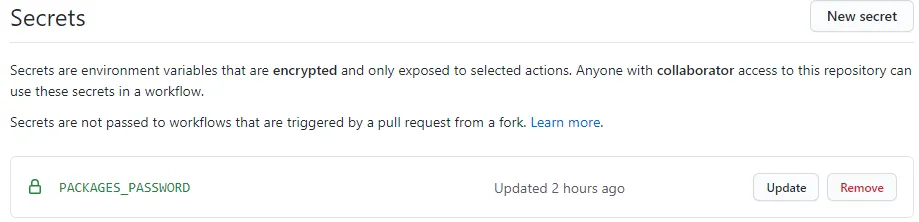
Inside our repository, go to the settings tab and then the secrets tab. There, we’ll create a new secret called PACKAGES_PASSWORD and put our access token content inside it:
Then, go to the actions tab inside the repository:

Click on new workflow (in my case, because I already had an existing workflow). When you’re taken to the screen where you’ll be presented with various workflows, click on the link below the title that says “Set up a workflow yourself”.

There you’ll have a small default document with some lines. We’ll make a change so our action runs only on pushes to the master branch and also on tags that start with v, so we can have v1.0.0 and so on.
See how our base file will look:
# This is a basic workflow to help you get started with Actions
name: Publish to GitHub Container Registry
on: push: branches: [ master ] tags: v*
# A workflow run is made up of one or more jobs that can run sequentially or in paralleljobs: # This workflow contains a single job called "build" build: # The type of runner that the job will run on runs-on: ubuntu-latest
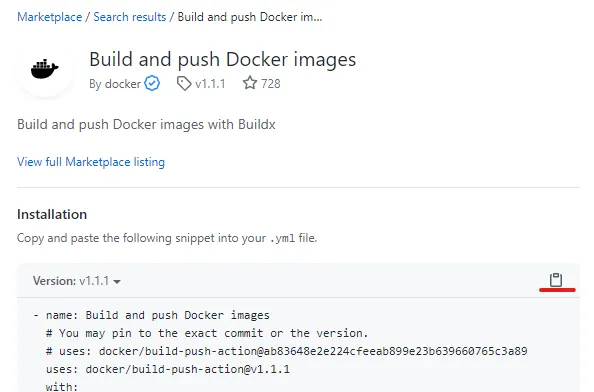
# Steps represent a sequence of tasks that will be executed as part of the job steps: # Checks-out your repository under $GITHUB_WORKSPACE, so your job can access it - uses: actions/checkout@v2Now, let’s go to the menu on the right side and look for the Docker action called “Build and push Docker images”

Copy the code by clicking the copy button on the right:
Paste it right below our previous action, inside steps. Then we’ll remove some of the lines that are set as parameters, because we won’t use all of them.
# This is a basic workflow to help you get started with Actions
name: Publish to GitHub Container Registry
on: push: branches: [ master ] tags: v*
# A workflow run is made up of one or more jobs that can run sequentially or in paralleljobs: # This workflow contains a single job called "build" build: # The type of runner that the job will run on runs-on: ubuntu-latest
# Steps represent a sequence of tasks that will be executed as part of the job steps: # Checks-out your repository under $GITHUB_WORKSPACE, so your job can access it - uses: actions/checkout@v2
- name: Build and push image uses: docker/build-push-action@v1.1.1 with: # Username used to log in to a Docker registry. If not set then no login will occur username: khaosdoctor # Password or personal access token used to log in to a Docker registry. If not set then no login will occur password: ${{ secrets.PACKAGES_PASSWORD }} # Server address of Docker registry. If not set then will default to Docker Hub registry: docker.pkg.github.com # Docker repository to tag the image with repository: khaosdoctor/zaqar/zaqar # Automatically tags the built image with the git reference as per the readme tag_with_ref: trueLet’s go through this file part by part so we can understand what’s happening. First, we’re telling the workflow in the name key that we’re naming this step of our process with a new name in addition to the action’s name. This is just for organization.
Then, we’re saying we’ll use Docker’s action as a base, passing the repository name and action name, as well as its version.
Then we’re setting the parameters we want:
usernameis the name of our GitHub userpasswordis our secret we just created, containing our access token so we can log in to the registry- Then we have the
registrykey, which is where we define which registry we’ll send our container to. In this case, since we’re using GitHub itself, we’ll set this value todocker.pkg.github.com - In the
repositorykey we put the name of our image. It should always be in this format we mentioned above, where we havenomedeusuario/repositorio/imagem:tag - Finally, we have the last configuration, which is the most interesting and saves the most work for developers. The
tag_with_refkey does some interesting things. The main one is that it automatically tags the image for us. When we push to themasterbranch directly, our image gets thelatesttag. When we push to a git tag, the image tag becomes the name of our git tag. You can read more about the peculiarities and how each configuration works on the action’s page
Once we’re done, we’ll name our file and save it. From there a new build will run and we’ll have a new image in our repository:

You can check the page for this individual package at this URL
Conclusion#
By combining GitHub with container registries, we have a much greater ability to unite our code and infrastructure in one place. This unification reduces our complexity because we have to deal with fewer environments, so we can think about other features that take advantage of these conveniences in the future!
I hope you enjoyed the article. Leave your comment, like, and share!
See you later!
Footnotes#
-
And more articles will come 😎 ↩