Hosting your Docker images in your own registry
One of the coolest things about Docker is that you already have, out of the box, a huge repository of images called Docker Hub where you can download and host your images publicly (and even privately, for a fee).
However, many times the Hub simply is not an option for you, which can happen when you don’t want to pull images from outside your local network, your firewall, or even when you need to run a quick test.
For this reason the registry, which is the platform we use to store our images, has a great advantage that many don’t know about, which is that it is built as a Docker image itself.
Let’s learn how to create our own Docker Registry and store our images locally!
Hosting our own registry#
Beyond solutions like Azure Container Registry, we have the option to run our own Docker registry instance to continue enjoying the same experience we already have with Docker.
First, what we need to do is run a local instance of the registry using the official image. We can do that with the following command:
docker run -d -p 5000:5000 --name docker-registry registry:2.7Remember that the previous command will only run the registry with ephemeral internal storage, meaning you will lose your images if you pause the container.
To run a persistent registry we can use the same command, but with the
-v seu/caminho:/var/lib/registryoption set before the image name.
From now on we can push any image to our local registry.
Working with images#
Naturally, when we create a registry that is only accessible via localhost, as we are doing here, we don’t need to set a password. However, best practice is that if you’re going to create a container that is accessible to people outside your local machine, always use a password and authentication with your registry.
We’ll learn how to do that authentication in another article, but now let’s focus on how we can push our images. For this example, choose any image from the hub and download it to your machine with the command docker pull <imagem>, I’ll use the Debian image.
Every Docker image must be identified by its name, so Docker knows which registry it refers to, this can be done in the form of an FQDN: url.do.registry:porta/repositorio/imagem:tag.
In our case the registry is running locally on port 5000, the repository would be like a group, so let’s create a group called official and, finally, the image is Debian’s. So, our image will have the name:
localhost:5000/official/debian:latestLet’s tag our image with the docker tag command to change its name:
docker tag debian localhost:5000/official/debian:latestThe command won’t give any output, but we can see the image in docker image ls, and now we can push the image to the registry with docker push localhost:5000/official/debian:latest.
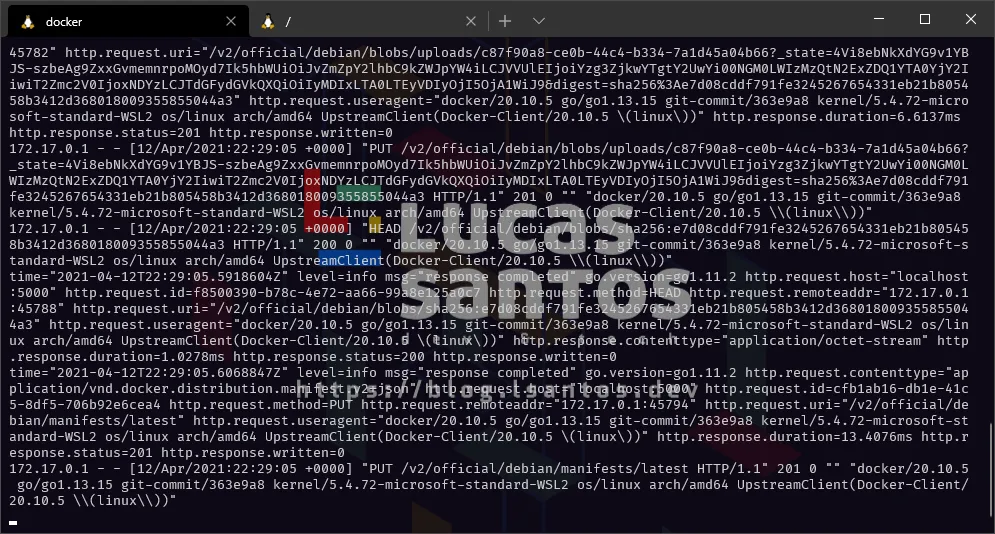
If we check the container logs with docker logs registry we’ll see that our registry received the image:
If we remove our local image with docker rmi localhost:5000/official/debian:latest, we’ll be able to use the docker pull command to fetch the image from our local registry and download it again:
docker pull localhost:5000/official/debianConclusion#
Using the registry is quite simple, in upcoming articles we’ll explore how we can expand its use and make our registry even more secure!
This was a short article but one that demonstrates a feature that few people know about how Docker works.
Don’t forget to follow me on social media for more content 😍