First steps with Neovim
I’ve always liked Vim, but this editor is worldwide known as one of the most complex pieces of software ever created to learn, even gaining the reputation of being the place you enter and never leave again.
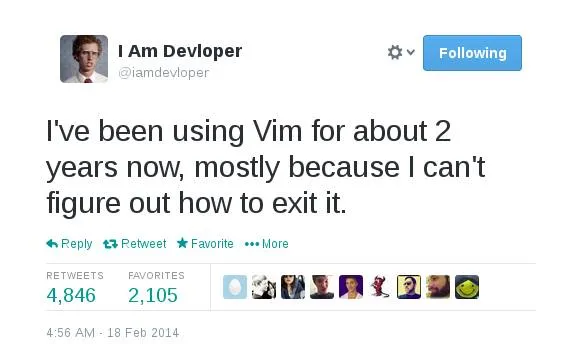
However, there’s the promise of “superhuman productivity” once you manage to feel comfortable enough with it.
Recently I decided to stop using VSCode 100% and start using only Neovim, and I’m going to show you how I did it to get it exactly like this:
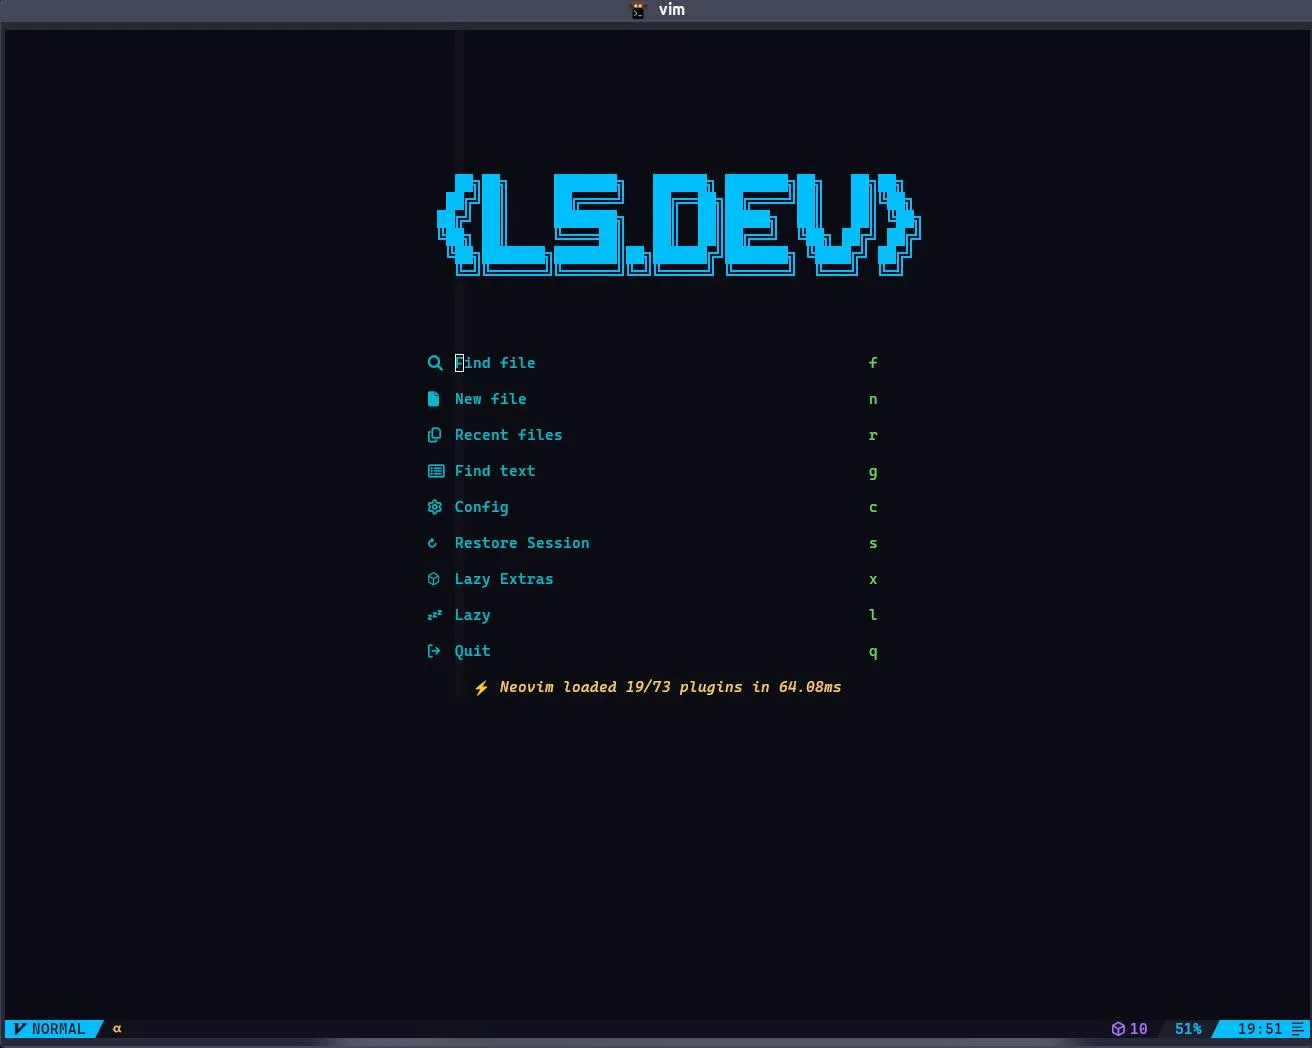
If you already know the editor, you can skip straight to the installation part. Or, if you want to know more about the history of Vim, Vi, and Neovim, let me tell you.
A little about Vim#
If you don’t know what Vim is, in a few words, it’s one of the oldest text editors still in use. It was created by a guy called Bram Molenaar in 1991 as an improvement to the original Vi editor, created by Bill Joy in 1976 as a visual mode for another editor called ed. That’s why Vim is the acronym for “Vi improved”.
Vi, like Vim, introduced a drastic change in the way we edit texts, almost surgical cursor movement, and also movement using the HJKL keys, as I explained in this thread:
🤓 Computing history pt 2: WHY DOES VIM USE H, J, K and L AS ARROWS???? Since you guys enjoyed my last thread about TTY I’m going to talk about another part of computing history here and why today’s technology is basically the same as 60 years ago. Just more colorful pic.twitter.com/qw4QU18OXt — Lucas Santos 🇧🇷🇸🇪 • formacaots.com.br 💎 (@_StaticVoid) July 23, 2024
https://twitter.com/_StaticVoid/status/1815722344142279159?ref_src=twsrc%5Etfw
Since then, many people love using Vim because it is extremely lightweight, easy to configure, and basically has its own programming language (VimL) that allows you to make macros and many other things in an absurdly powerful way.
The only problem is that it has one of the steepest learning curves in history because commands are defined as sequences of individual keys and combinations of letters, but whoever manages to master Vim gets a tremendous increase in productivity simply because the editor is extremely responsive.
I won’t focus on how to use Vim here, partly because I myself am not a master at using it, but there are several cool sites like Vim Adventures and VSCode extensions that you can check out.
Unfortunately, Vim by itself, the way it comes “out of the box”, despite being completely usable, is not what I would call a good code editor. It could have been in 1991, but with the advancement of technologies, the increasingly closer integration of languages with editors, and the movement away from large complex IDEs to smaller editors with plugin support, Vim became a bit outdated, even though it gained plugin support.
Enter Neovim#
Neovim is a fork of the original Vim made by a Brazilian called Thiago Arruda after he didn’t get support to implement a change in the original Vim that would allow the editor to have multiple threads and be controlled by external processes. The first commit of Neovim happened on January 31, 2014.
Among the many innovations of Neovim, native support for Lua is one of the main ones, which means you can write plugins and tools in a much simpler way than using C or VimL which, although good, are complicated. In addition to having asynchronous processing and native support for LSPs (Language Server Protocol) that allow real-time communication of what you’re writing and a background server that will analyze your code (that’s how we get auto completions, intellisense, and error analysis).
From then on, NVim gained increasingly more community support and contributions from some companies through OpenCollective, and now it’s a completely self-sustaining open source project maintained by some developers full-time. And it’s the one we’re going to modify today.
Prerequisites#
Before we start, I’m going to mention some prerequisites you need to have to follow this tutorial in a way that you can make the most of it.
1 - Have some type of Linux#
Although it’s definitely possible to install Neovim on Windows with Powershell, I’m going to do the same thing with a Linux system. You can be using Mac, some Linux distribution, or even WSL on Windows with the distro you prefer.
I’m writing this article on Arch Linux, but everything I say here can be transposed to Mac (Darwin) without any problems, the files are in the same place.
2 - Have a ready shell#
I’m using a ZSH with Zinit and several plugins (you can see my dotfiles here), the shell itself doesn’t matter, you can use bash, sh, Fish, or whatever, what’s important is that you have it fully configured to avoid problems with environment variables.
3 - Install Neovim#
You can install Neovim by following the instructions directly on the official website. In general, on Mac you should already have it installed by default, otherwise just use Homebrew with brew install neovim.
In the case of Arch, I used YaY with yay -S neovim, your distribution probably has something similar.
After installation, when you run neovim for the first time by typing nvim with no configuration, it will look like this:
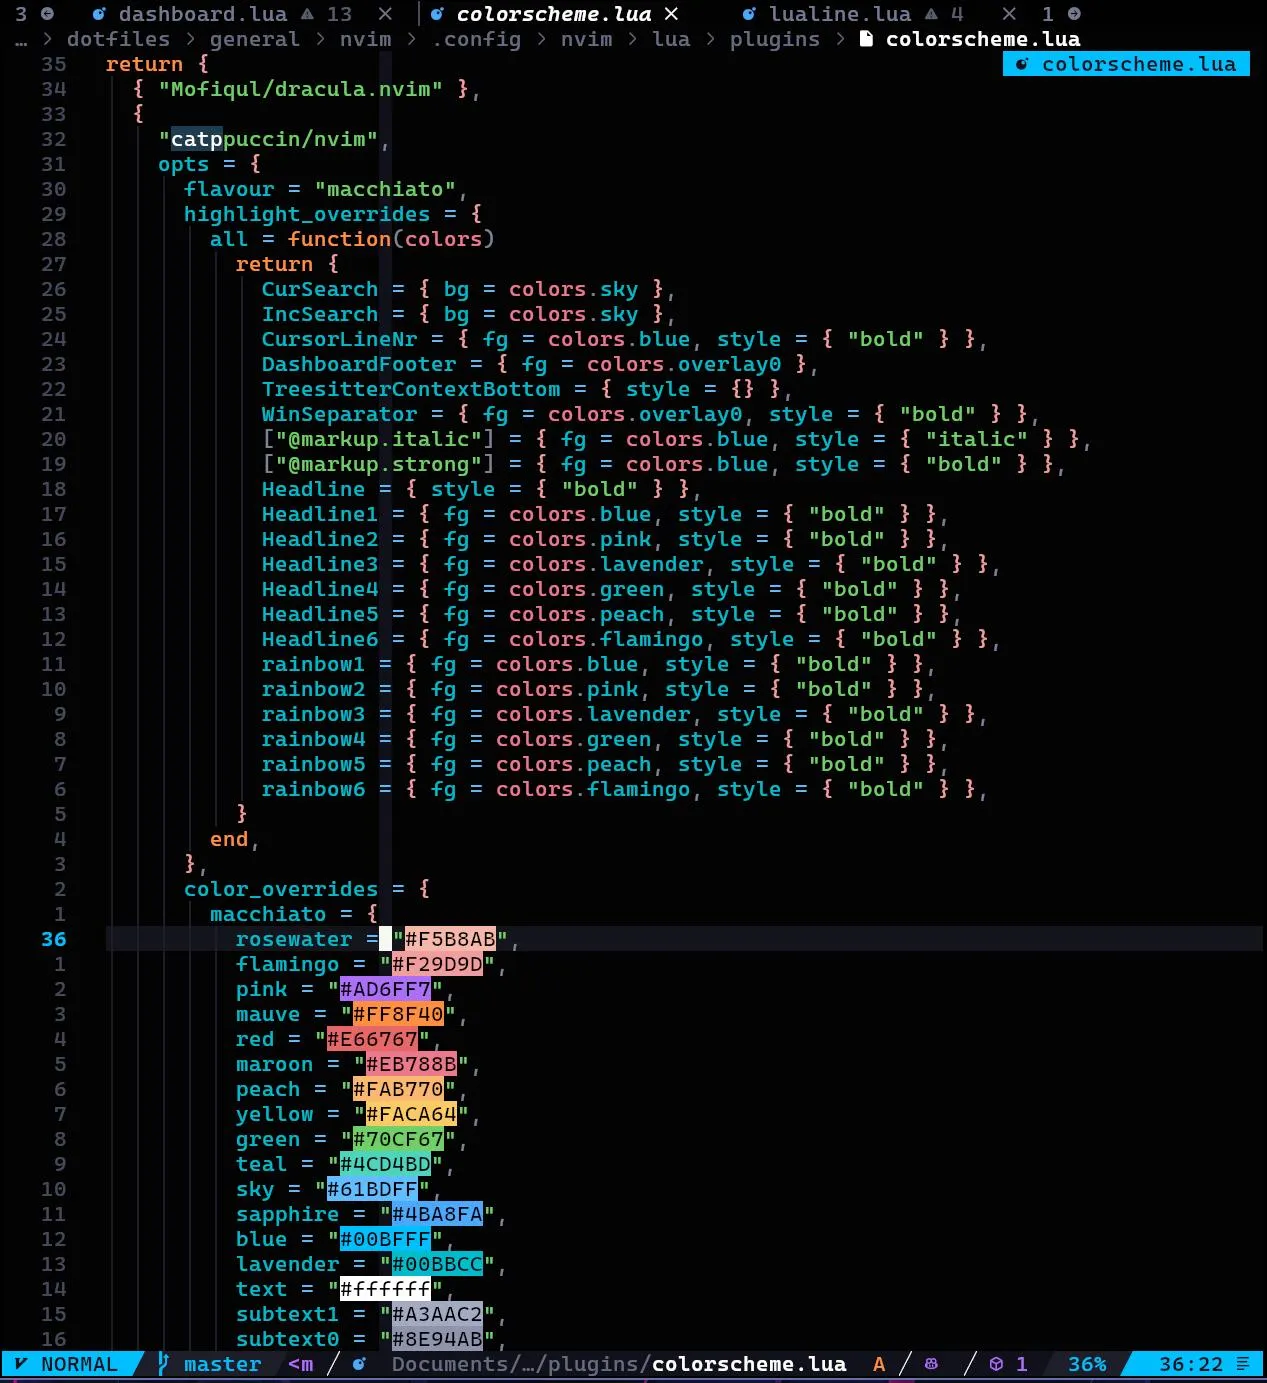
It’s definitely possible to exit Neovim by pressing
escand then:q!<enter>
4 - NerdFonts#
A very important part of this setup is NerdFonts. A NerdFont is a common font, but packaged with all the icons and glyphs you can imagine. Basically, it’s like your Arial font having a lot of drawings together, including Font Awesome icons and many other glyphs transformed into fonts that we see around.
You can install the font you prefer, but a required font is MesloLG. You can install these fonts in several ways, the simplest being to go to the downloads page, find the font, and add it to your font library.
As a general rule, always prefer to install the NerdFont variations of your preferred font if they exist. The chance of you having problems with text not being displayed will be much lower.
Another way that I prefer is to install using your package manager. In the case of brew, you can search for fonts using brew search font-<name> and download the one with the nerd-font name at the end, for example:
$ brew install --cask font-meslo-lg-nerd-fontIn the case of Arch, it’s the same thing but with yay:
$ yay -S ttf-meslo-nerdIf you want to install other fonts, I also recommend CaskaydiaCove Nerd Font (my current font), Fira Code Nerd Font, and Hack which are very interesting fonts and easy to read.
5 - Lazygit#
Install LazyGit, which is a git client directly from the terminal. You can install it directly with brew using brew install lazygit or yay lazygit in the case of Arch.
Lazy and LazyVim#
I won’t go into details about the basics of Vim or Neovim, but I want to get straight to the point and show you how you can start as quickly as possible in a simple way.
There’s a plugin manager project called lazy.nvim.
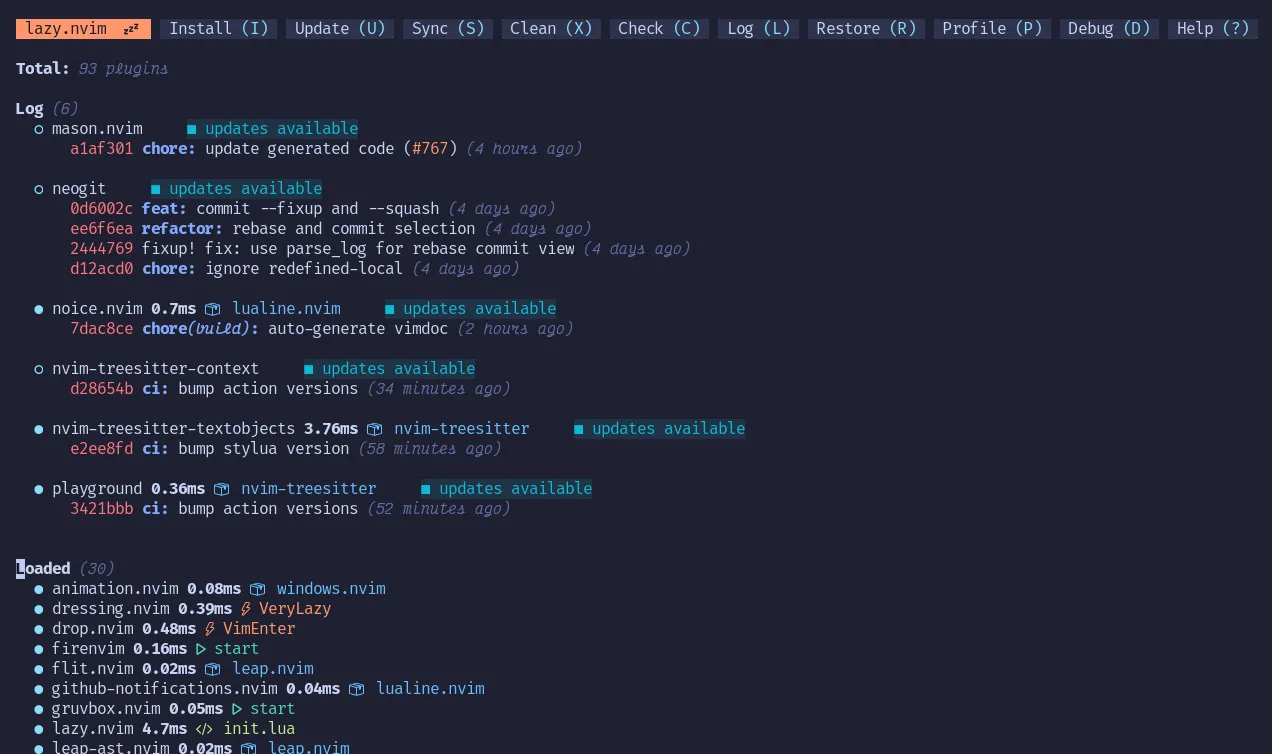
The idea of a plugin manager, like NPM, RubyGems, or any other package manager, is literally to make it easy to load external functionalities through plugins in Neovim. Think of them like VSCode extensions.
Well, the same creator of lazy.nvim took it a step further and created a “beginner kit” for those who want to start with neovim already with several good initial setups, a series of plugins, and a series of ready-made configurations. And that is LazyVim.
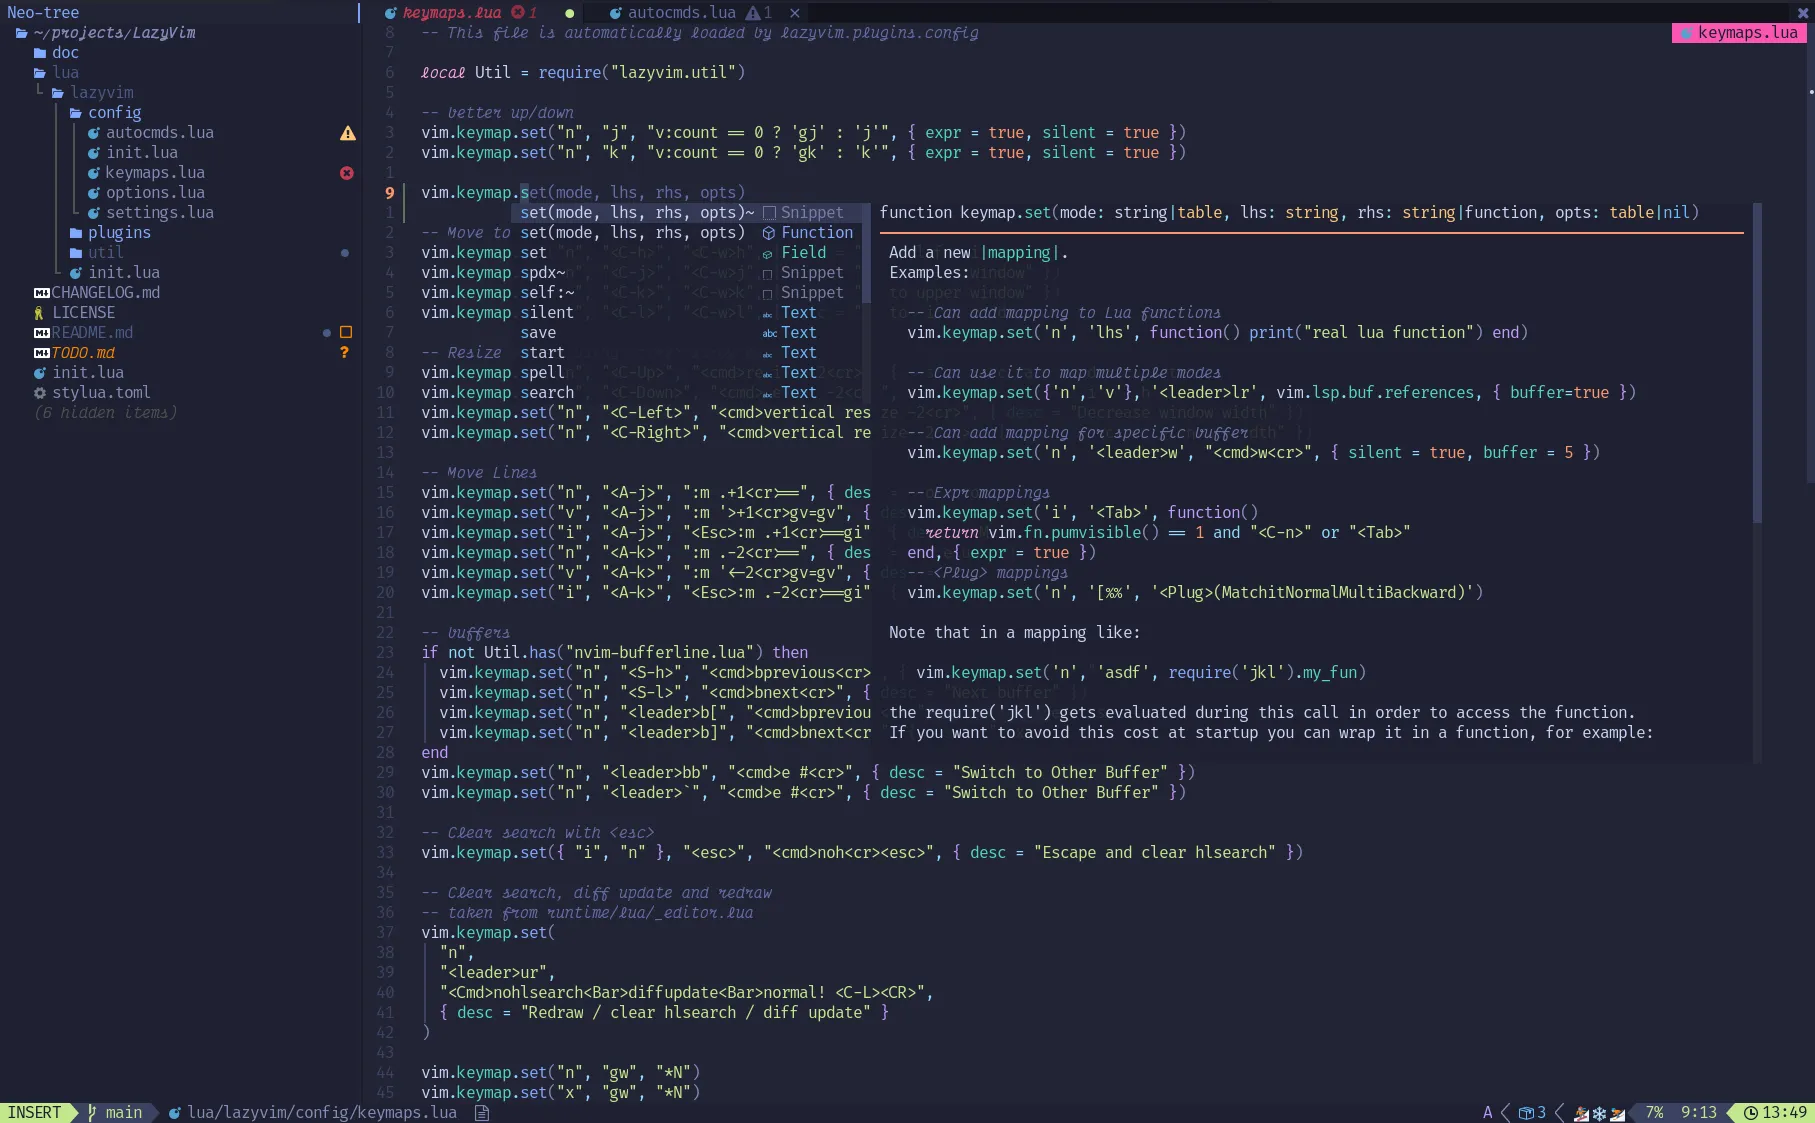
LazyVim is extremely similar to VSCode, which makes the whole process very simple and easy to transition to, plus it has a series of commands that are already ready and a search for keybindings so you don’t get lost. Besides, it also supports mouse, so if you want to click on something it’s pretty simple.
Installing#
The LazyVim installation is pretty straightforward, first you make a backup of your configurations:
mv ~/.config/nvim{,.bak}mv ~/.local/share/nvim{,.bak}mv ~/.local/state/nvim{,.bak}mv ~/.cache/nvim{,.bak}Keep in mind that not all folders will exist, especially if you just created the Neovim installation.
By default, all configurations will be saved in
$HOME/.config/nvimbut LazyVim will be installed in$HOME/.local/share/nvim/lazy, including all the configurations and plugins it already has. Remember that you should NOT touch this directory.
Then just clone the repository with Git:
git clone https://github.com/LazyVim/starter ~/.config/nvimAnd then remove the .git folder from inside this repository so you can modify it without having the history.
Now just run the nvim command, you should already see some changes in your configuration and should be seeing the default Lazy screen.
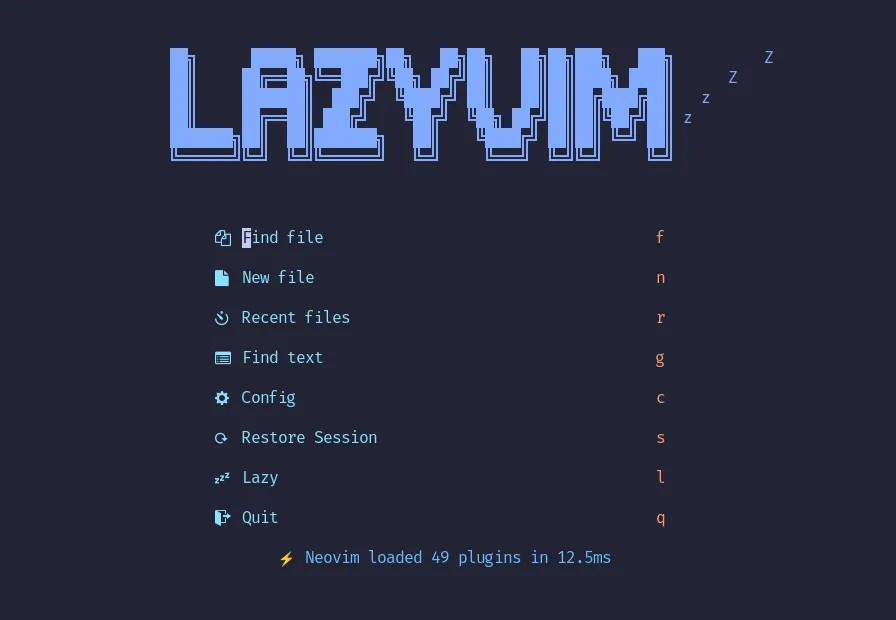
Type :LazyHealth and press enter to make sure everything is running well.
The <leader> key#
Lazy, like many others, has a base key for other combinations, this key is <leader> which is mapped to the space bar by default. Press <leader> and you’ll see a keybinding guide appear at the bottom of the screen. This is a plugin called WhichKey (which was also created by Folke, the creator of Lazy):
Just press the next key in the sequence to execute the action or go to the next page (in the case of bindings that have a + in front, like +g which opens git). Try <leader>l and see the Lazy “home” screen open:

You can navigate through this window using the letters in the header, for example I shows all installed plugins, U will update all of them, S will sync with the repository and so on.
Remember that
Uanduare different from Vim’s perspective. So if you see a sequence like<leader>bD, type it exactly as it is:<space>b<shift>d
Press q to exit the panel. Now it’s time to take a tour of the basic features.
Basic tour#
Let’s start with the simplest and most useful features.
Explorer (Neotree)#
Lazy comes with a plugin called neotree, which is a plugin to show a file navigation bar like VSCode’s explorer. You can access this feature with <leader>e.
You don’t need to wait for WhichKey to appear, just press as fast as you can, remember that speed is what matters here.
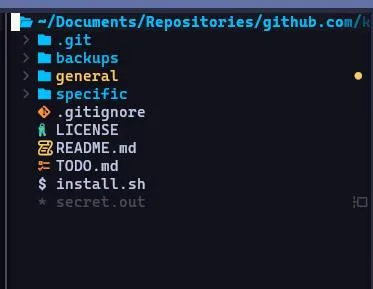
You can navigate through it with HJKL. J and K will go down and up. H and L navigate in and out of folders. To open a file press Enter. Here are some useful shortcuts:
a: Creates a new filer: Rename the filed: Delete the fileC: Close the current folder and go up one level/: Start search?: Show the list of shortcuts
Movement#
Open vim in the ~/.config/nvim folder. Let’s start there. Select the file lua/config/lazy.lua. This is the main lazy configuration file, but we almost never touch it.
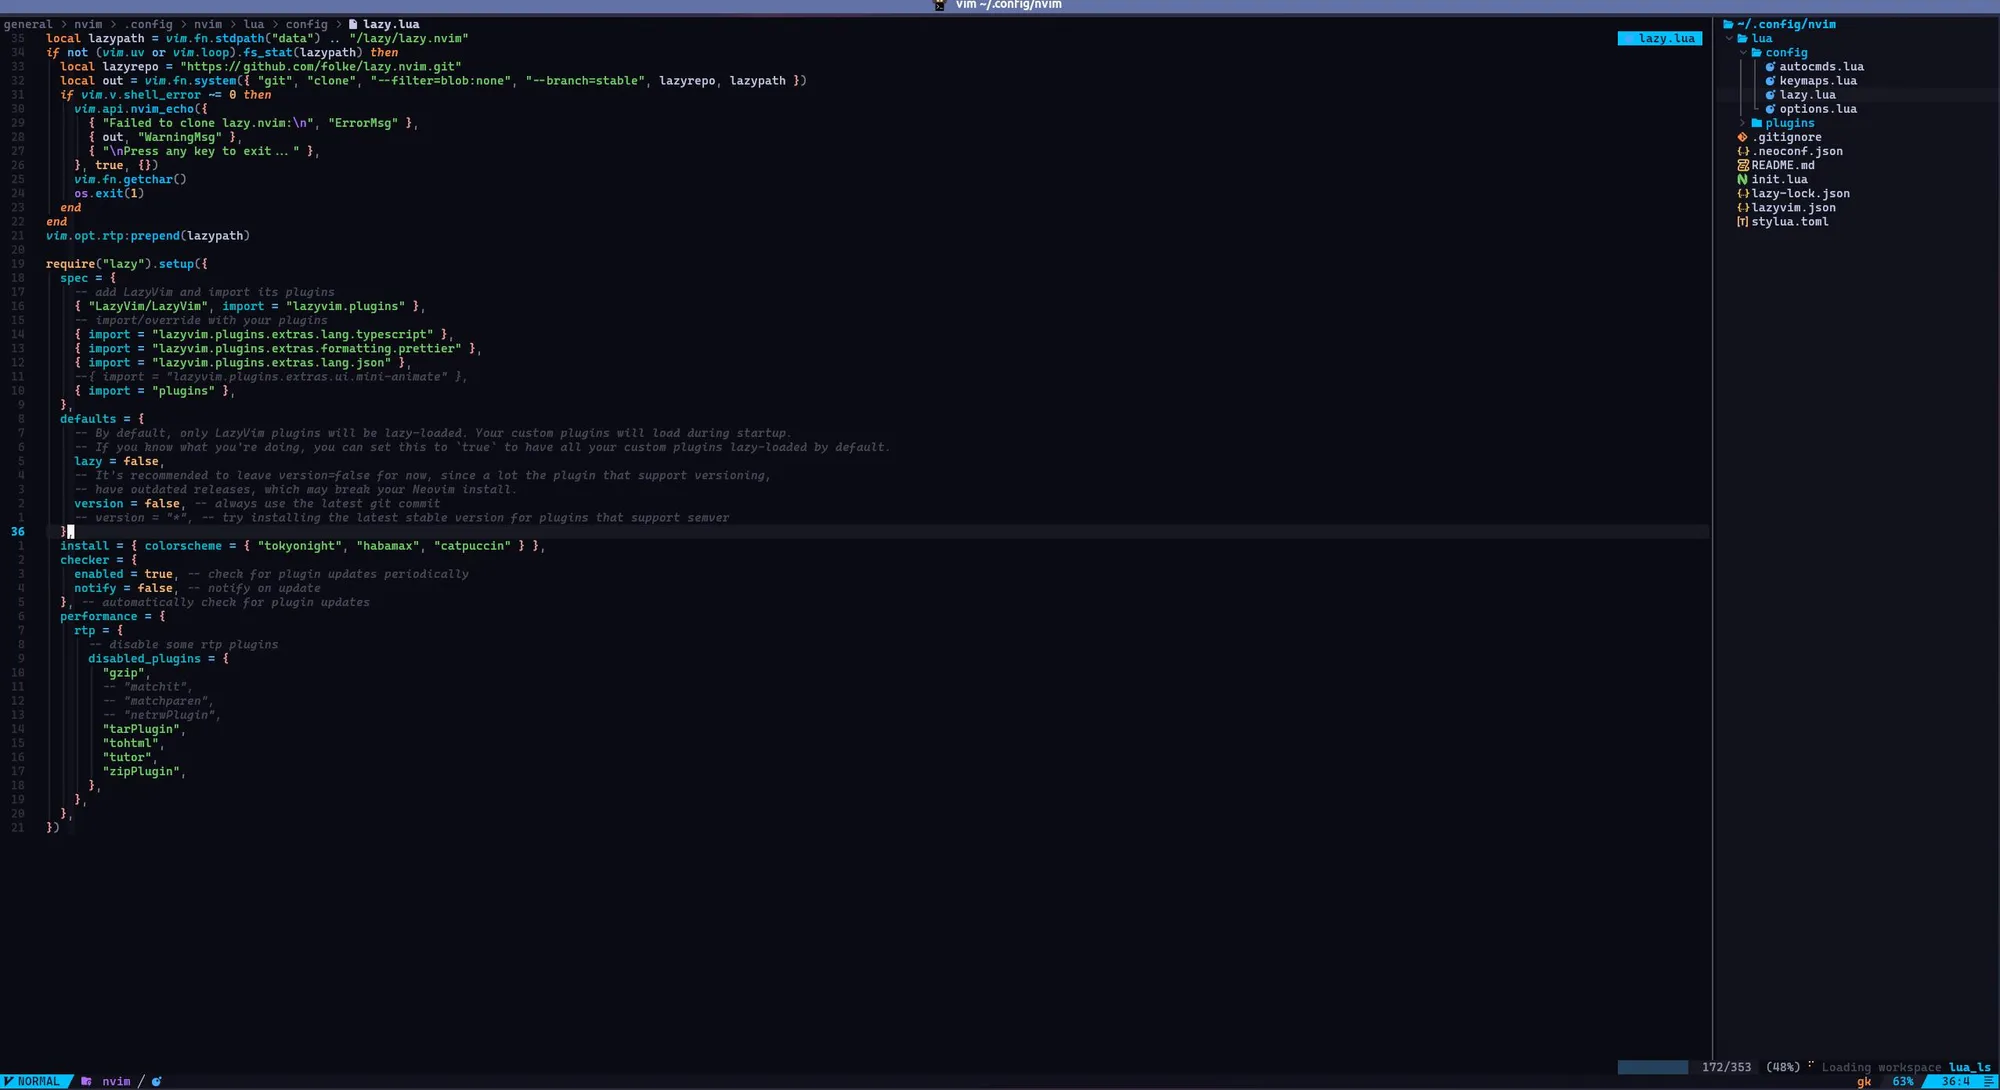
Press <C-l> or <Ctrl>+l to go back to Neotree. Now open the options.lua file. Notice that we have two tabs at the top. These are the buffers. Each buffer is a file in memory, and it’s important to say that they are not tabs!
In Vim, the concept of tabs and buffers is different. Tabs are like completely separate spaces that can have a completely separate window configuration. Buffers are the files opened inside a tab and they can be reorganized into windows in that tab. Most of the time you’ll only have one tab open.
To move between one file and another use L and H, or gn and gp. You can also take advantage of another plugin, Telescope.
Close this buffer with <leader>bd.
Vim has the concept of buffers and windows. A buffer is a file or text source that you are editing. It may or may not be a physical file on your computer, but it will always be a file in memory. When you write in the buffer, you are first writing in memory, and when you save, transferring the write to the file.
A window is like another instance of your Vim window. It’s like another tab in a browser, a different and isolated environment from any other buffer.
Telescope#
Telescope is another plugin made for searching files. Let’s open another file with it. Press <leader>ff to open the Telescope window:
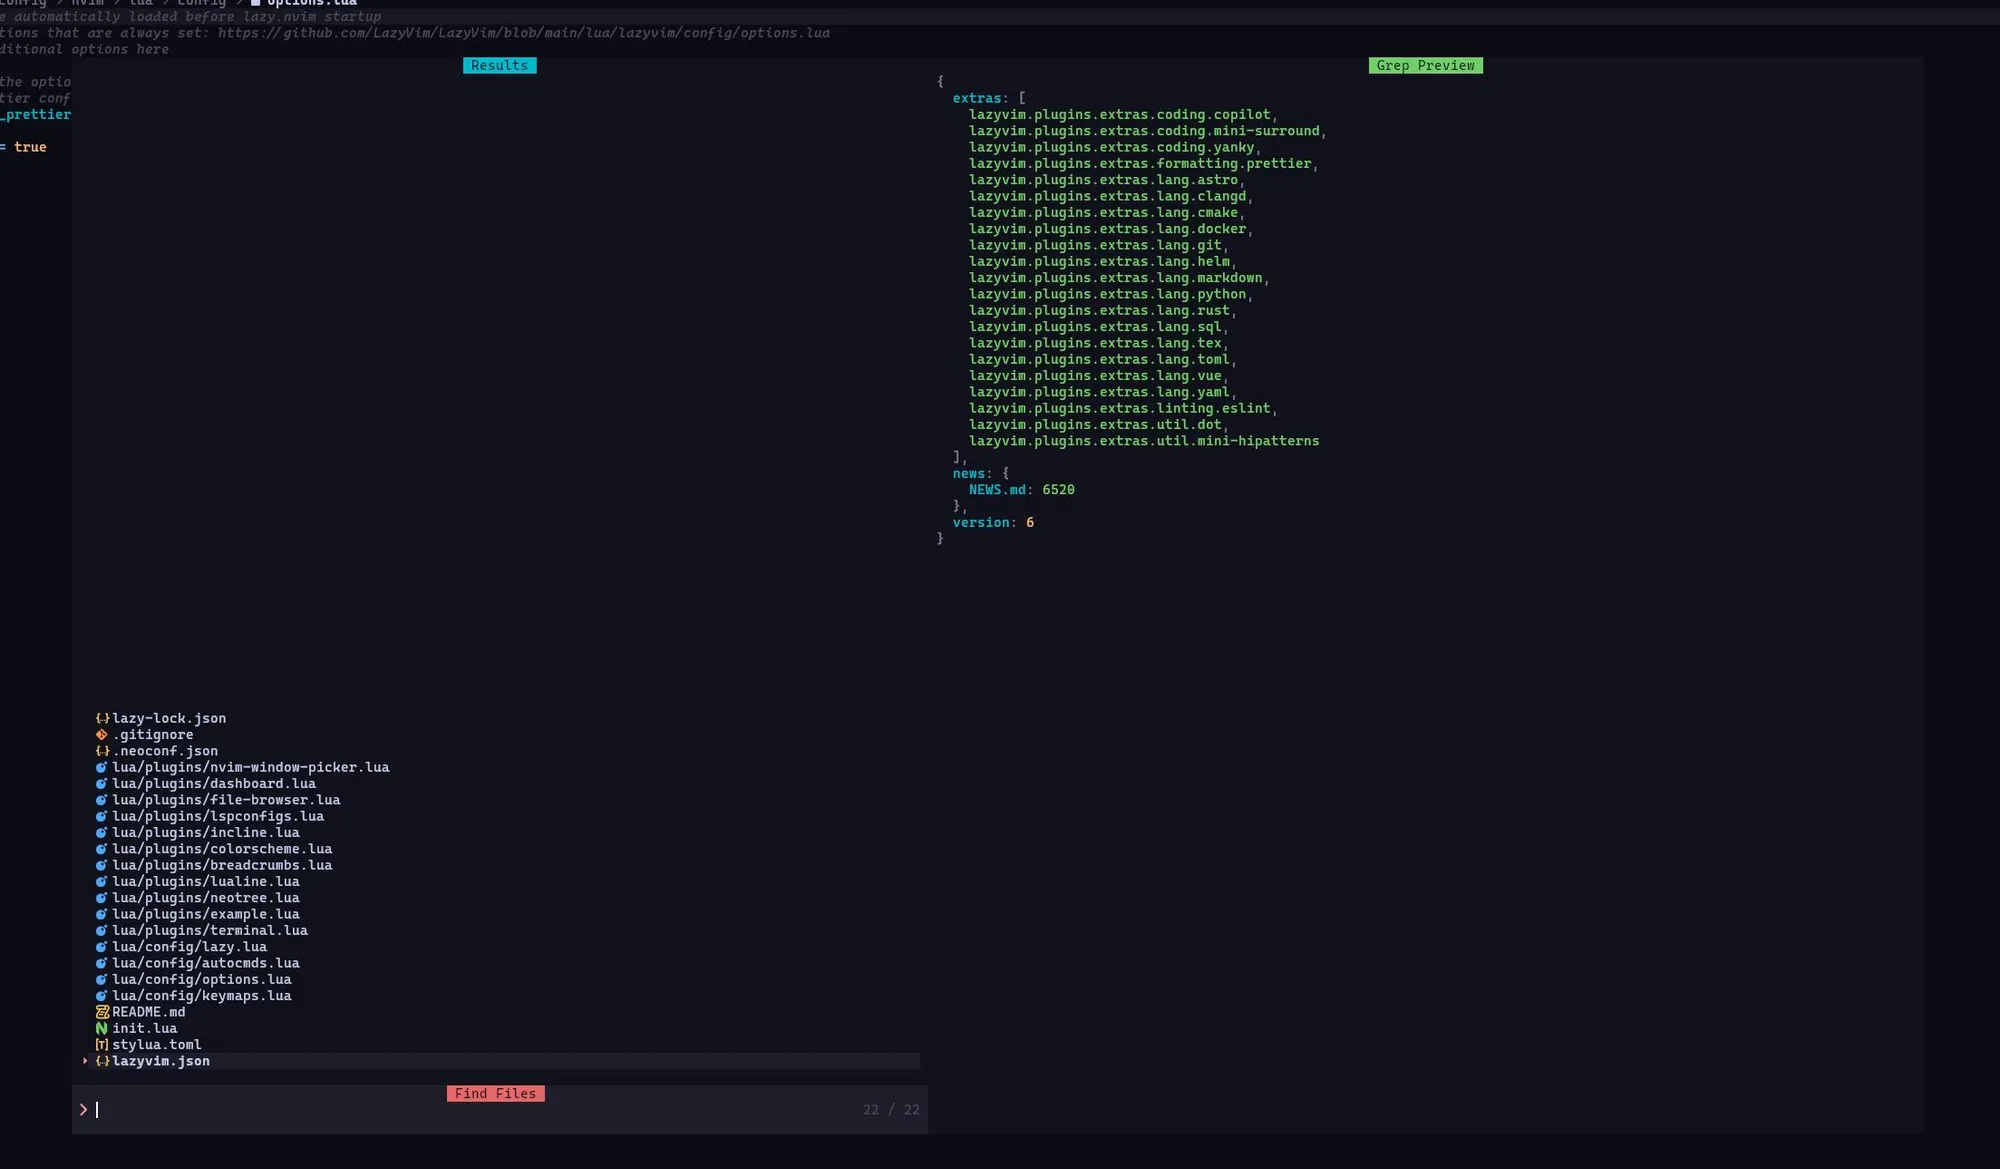
Here you can type directly to search for the file, navigate with the arrows or with <C-n> and <C-p>. You can also open the list of shortcuts with <C-?>. Open another file with it.
You can also access telescope for files with
<leader><leader>
There are infinite options for Telescope. For example, you can search among all open files (buffers) with <leader>fb. In fact, most things you can do with Telescope will be within <leader>f, or then <leader>s, which are the global search commands.
Configuration#
Now that we know the basics, let’s start configuring our editor. Lazy will initially read all files in the lua/config folder as initial configurations, starting with lazy.lua. Then it will read all plugins from the plugins folder.
So to add new features, we just need to change these files:
lua/config/options.lua: General options and on/off type configurationslua/config/keymaps.lua: Key mapping, here we’ll modify the shortcutslua/config/autocmds.lua: If you have any vim auto command, this is the place to put itlua/plugins: Any lua file in here will be read and added to the plugins, so you can separate by category (ui, search, code, etc) or by plugin name, which is what I did.
Lazy.lua#
Let’s start with the file we have to modify the least, the lazy.lua file. Here we’ll enable only what are called LazyExtras, factory configurations that Lazy already brings ready and allows you to extend or modify later in the plugins folder.
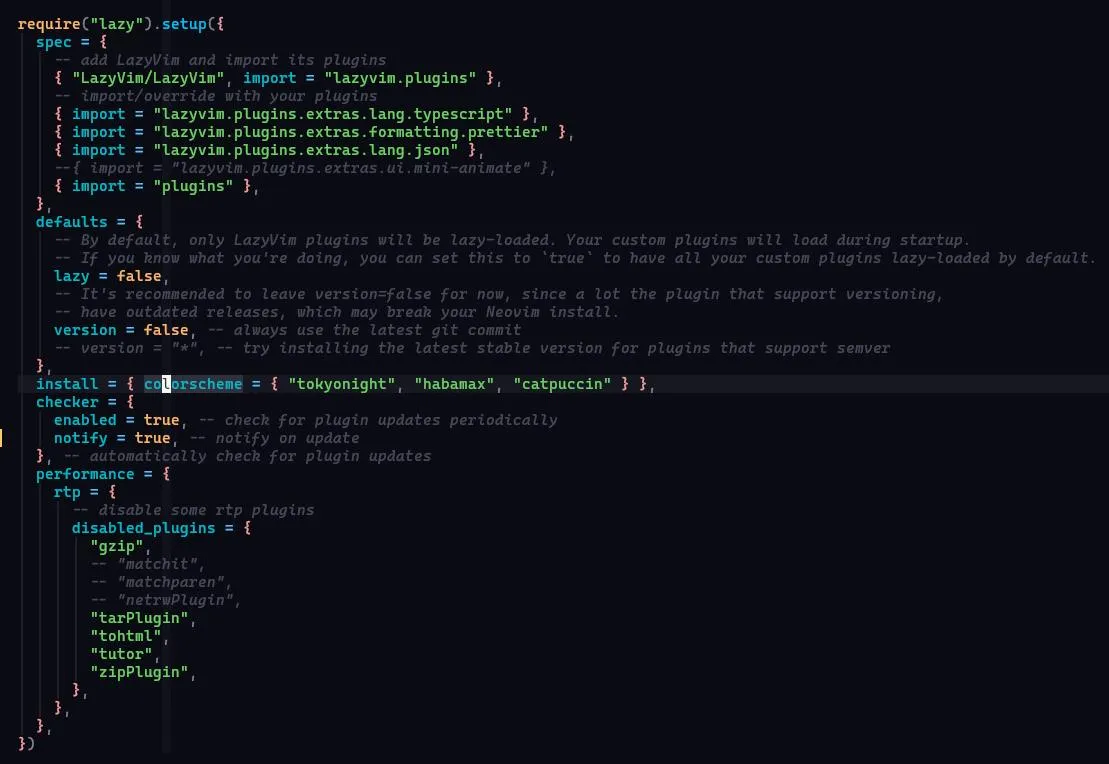
Let’s focus on this section only. Uncomment the three lines above { import = "plugins" }. The first one will enable native TypeScript support (which we’ll configure later in the LSPs), formatting with Prettier, and the JSON extension.
Besides that, we’ll also add a theme. I’m using the modified catpuccin theme, but we won’t install it now.
Remember that you can install any theme you want and Lazy already has some pre-installed that you can test with
<leader>uC
Another detail is that, after some Lazy updates, TypeScript integration ended up starting to use another LSP (we’ll talk about it shortly), so I ended up disabling this configuration.
options.lua#
The options file is the file that will have the main options, like space sizes, columns, etc. It’s generally a very small and very personal file. In my case, I only put the simplest configurations:
-- Options are automatically loaded before lazy.nvim startup-- Default options that are always set: https://github.com/LazyVim/LazyVim/blob/main/lua/lazyvim/config/options.lua-- Add any additional options here---- -- Enable the option to require a Prettier config file-- If no prettier config file is found, the formatter will not be usedvim.g.lazyvim_prettier_needs_config = true-- Auto wrapvim.opt.wrap = true-- Attempt to fix indentvim.opt.tabstop = 4vim.opt.shiftwidth = 4vim.opt.expandtab = truevim.opt.autoindent = truevim.opt.smarttab = true
-- Highlights for cursor columnvim.cmd.set("cursorcolumn")vim.cmd("highlight CursorColumn ctermbg=Blue")vim.cmd("highlight CursorColumn ctermfg=Black")
-- Vim does not recognize the alt key in Mac-- https://stackoverflow.com/questions/7501092/can-i-map-alt-key-in-vim-- So we have to use the response from stty -icanon; cat (press alt + key)-- to get the correct key code, then we can map it to something else-- NOTE: ^[ is the escape character \e in vimvim.cmd("set <M-BS>=\\e?") -- in this example alt+backspace is ESC+? which is mapped to <M-BS>From top to bottom, the configurations are as follows:
- Disable prettier if there is no
.prettierrcconfiguration file in the folder, because I don’t like enabling prettier globally (actually, I don’t like enabling anything globally) - Enable Auto Wrap to be able to break lines automatically when they reach the end of the screen
- The next options from
tabstoptosmarttabare related to tab and space configurations. Here I’m defining that each tab will be 4 spaces and by default the projects will use 4 spaces of indentation. This is not something I really like, but unfortunately most of the projects I’m using lately are using this configuration. - I set a clearer line where my cursor is, both horizontally and vertically. This helps me find it more easily on the screen.
- The last option is a change so that Vim recognizes the Alt key on Mac, which is mapped to command. See the link in the comment to understand better how it works.
autocmds.lua#
Another really interesting thing about vim is that it’s possible to automatically execute commands according to execution hooks. For example, whenever you enter a buffer that has a certain name, or whenever you exit some buffer, and so on.
I have some specific functions for markdown files, which I end up using a lot, like setting the file type to markdown, defining a line at 80 chars to limit the text, etc.
-- Autocmds are automatically loaded on the VeryLazy event-- Default autocmds that are always set: <https://github.com/LazyVim/LazyVim/blob/main/lua/lazyvim/config/autocmds.lua>-- Add any additional autocmds herelocal function augroup(name) return vim.api.nvim_create_augroup("custom_" .. name, { clear = true })end
-- auto set markdown filetypevim.api.nvim_create_autocmd({ "BufNewFile", "BufFilePre", "BufRead" }, { pattern = { "*.md" }, callback = function() vim.cmd("set filetype=markdown") end,})
-- Auto set markdown to break at 80 chars and highlight the 80th columnvim.api.nvim_create_autocmd({ "BufWinEnter" }, { pattern = { "*.md" }, callback = function() vim.opt.colorcolumn = "80" vim.opt.textwidth = 80 end,})
-- On leaving markdown files, reset the colorcolumn and textwidthvim.api.nvim_create_autocmd({ "BufWinLeave" }, { pattern = { "*.md" }, callback = function() vim.opt.colorcolumn = "120" -- disabled textwidth vim.opt.textwidth = 0 end,})
-- auto set i3config filetypevim.api.nvim_create_autocmd({ "BufNewFile", "BufFilePre", "BufRead" }, { pattern = { "*.i3config" }, callback = function() vim.cmd("set filetype=i3config") end,})This file is not mandatory, and most of the time it will be empty, unless you have some type of command you want to always run according to some type of buffer. For example, always run an ESLint when you’re in a JS file or something like that.
keymaps.lua#
The last of the files in the config folder is the keymaps.lua file. As you might imagine, it has the keyboard shortcuts that you want to customize. At this point, I’ll put my entire file here, which is quite large, but you don’t need to follow exactly what’s here. Feel free to add the ones you want.
I’ll try to leave comments where relevant.
-- Keym automatically loaded on the VeryLazy event-- Default keymaps that are always set: https://github.com/LazyVim/LazyVim/blob/main/lua/lazyvim/config/keymaps.lua-- Add any additional keymaps here
-- Habilita voltar onde paramos em qualquer busca do telescopevim.keymap.set( "n", "<leader>sx", require("telescope.builtin").resume, { noremap = true, silent = true, desc = "Resume telescope search" })
-- Move blocos de texto no Linuxvim.keymap.set("v", "<A-j>", "<cmd>m '>+1<cr>gv=gv", { noremap = true, silent = true, desc = "Move line down" })vim.keymap.set("v", "<A-k>", "<cmd>m '<-2<cr>gv=gv", { noremap = true, silent = true, desc = "Move line up" })vim.keymap.set("n", "<A-j>", ":m '.+1<CR>==", { noremap = true, silent = true, desc = "Move line down" })vim.keymap.set("n", "<A-k>", ":m '.-2<CR>==", { noremap = true, silent = true, desc = "Move line up" })
-- Move blocos de texto (mac)-- https://stackoverflow.com/questions/7501092/can-i-map-alt-key-in-vim)vim.keymap.set("v", "˚", ":m '<-2<CR>gv=gv", { noremap = true, silent = true, desc = "Move line up" })vim.keymap.set("v", "∆", ":m '>+1<CR>gv=gv", { noremap = true, silent = true, desc = "Move line down" })vim.keymap.set("n", "∆", ":m '.+1<CR>==", { noremap = true, silent = true, desc = "Move line down" })vim.keymap.set("n", "˚", ":m '.-2<CR>==", { noremap = true, silent = true, desc = "Move line up" })
-- Muda de janelas em modo de edição usando tabsvim.keymap.set("n", "<F8>", "gt", { noremap = true, silent = true, desc = "Switch to next tab" })vim.keymap.set("n", "<F7>", "gT", { noremap = true, silent = true, desc = "Switch to previous tab" })
-- duplica a linha atual para baixovim.keymap.set("n", "<C-S-d>", "yyp", { noremap = true, silent = true, desc = "Duplicate line down" })
-- Comandos relativos a navegação em buffers
-- Próximo buffer da listavim.keymap.set("n", "gn", "<cmd>bn<cr>", { noremap = true, silent = true, desc = "Next buffer" })vim.keymap.set("n", "<tab><tab>", "<cmd>bn<cr>", { noremap = true, silent = true, desc = "Next buffer" })vim.keymap.set("n", "<tab>n", "<cmd>bn<cr>", { noremap = true, silent = true, desc = "Next buffer" })
-- Buffer anteriorvim.keymap.set("n", "<S-tab>", "<cmd>bp<cr>", { noremap = true, silent = true, desc = "Previous buffer" })vim.keymap.set("n", "gp", "<cmd>bN<cr>", { noremap = true, silent = true, desc = "Previous buffer" })vim.keymap.set("n", "<tab>p", "<cmd>bp<cr>", { noremap = true, silent = true, desc = "Previous buffer" })
-- deletar/fechar buffervim.keymap.set("n", "<tab>d", "<cmd>bd<cr>", { noremap = true, silent = true, desc = "Delete buffer" })vim.keymap.set("n", "<tab>q", "<cmd>bd<cr>", { noremap = true, silent = true, desc = "Delete buffer" })vim.keymap.set("n", "<tab>w", "<cmd>bd<cr>", { noremap = true, silent = true, desc = "Delete buffer" })
-- busca no telescope para buffersvim.keymap.set("n", "<tab>f", "<cmd>Telescope buffers<cr>", { noremap = true, silent = true, desc = "Find buffer" })
-- Deleta a palavra atual com Alt+BS-- mac (see options.lua)vim.keymap.set("n", "<M-BS>", "hdiw", { noremap = true, silent = true, desc = "Delete word" })-- linuxvim.keymap.set("n", "<A-BS>", "hdiw", { noremap = true, silent = true, desc = "Delete word" })
-- cmd P para encontrar arquivosvim.keymap.set("n", "<C-p>", "<cmd>Telescope find_files<cr>", { noremap = true, silent = true, desc = "Find files" })
-- cria um terminal novolocal wk = require("which-key")wk.add({ { "<leader>t", group = "Terminals" }, { "<leader>tt", function() TermNumber = (TermNumber or 0) + 1 local term = require("toggleterm") term.toggle(TermNumber) end, desc = "New toggle terminal", }, { "<leader>ts", "<cmd>:TermSelect<cr>", desc = "Find open terminals" }, { "<leader>tf", "<cmd>:TermSelect<cr>", desc = "Find open terminals" }, { "<leader>tr", "<cmd>exe v:count1 . 'TermSelect'<cr>", desc = "Find open terminals" }, { "<leader>th", "<cmd>exe v:count1 . 'ToggleTerm'<cr>", desc = "Toggle docked terminal (prefix number before command)", }, { "<C-.>", "<cmd>:ToggleTerm<cr>", group = "Terminals", desc = "Toggle docked terminal", mode = { "n", "t" } },})
-- controle de banco de dados com o plugin DadBodwk.add({ { "<leader>D", group = "Database" }, { "<leader>DD", "<cmd>DBUI<cr>", desc = "Toggle DBUI" }, { "<leader>Dx", "<cmd>call <SNR>79_method('execute_query')<cr>", desc = "Run Query" },})
-- deleta uma marca do vim usando delmarkwk.add({ { "<leader>dm", "<cmd>exe 'delmark ' . nr2char(getchar())<cr>", desc = "Delete a mark <markname>" },})
-- Move uma linha para baixo sem entrar em modo de ediçãowk.add({ { "<leader>o", "o<esc>", desc = "New line below in normal mode" }, { "<leader>O", "O<esc>", desc = "New line above in normal mode" },})
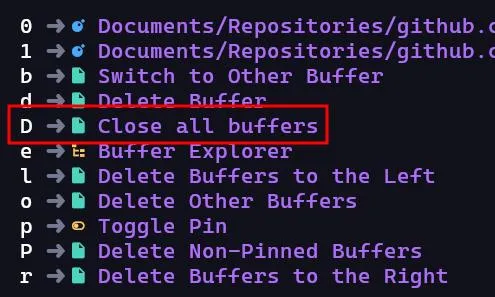
-- Fecha todos os bufferswk.add({ { "<leader>bD", "<cmd>BufferLineCloseOthers<cr><cmd>bd<cr>", desc = "Close all buffers" },})The basic structure is vim.keymap.set("mode", "shortcut", "command"), followed by options for command description, whether or not to remap, and so on. Below you have a wk.add which is the WhichKey. This allows us to add the shortcuts that appear in the WhichKey shortcuts bar when you press <leader> (space in my case). For example, I have a shortcut that is <leader>bD to close all buffers. If I press <leader>b you’ll see that this shortcut also appears in the list:
Plugins#
Now that we’ve finished all the configuration parts, we can start talking about plugins, the great power of Neovim with Lazy.
All plugins are loaded using lazy.nvim which is, as you might imagine, from the same creator of LazyVim. The idea of lazy.nvim is that it has a directory called plugins in the lua folder. Inside it, you can create any .lua file that returns a dictionary (or table) in this model:
return { "name/of/plugin", event = "event to load if possible", keys = { { "shortcut", "command", desc = "shortcut description" } }, config = function() -- something here end}The plugin name can be a GitHub repository, for example, "b0o/incline.nvim", or a complete URL of a Git repository (it’s important that it’s a Git because lazy will download all your plugins using Git).
You can optionally define an event where this plugin is loaded. For example, a markdown plugin doesn’t make sense to be loaded in a JS file and so on, but it’s not mandatory. If omitted, it will be loaded during initialization.
Also, optionally, you can define the shortcuts related to that plugin directly in its configuration using the keys key. The structure is the same as in keymaps.lua.
At the end, we have the most important part, which is the options and configurations of the plugin. This part can be a function that should return a table. In general, some plugins will ask that you call the plugin’s setup method, but if omitted, lazy will call the setup method with no parameters.
Another option you can pass, instead of config, is an opts property which will be a table, or a function that returns a table. This options table will be passed to the plugin’s setup method. Let’s look at two examples. The first is with the config property:
return { "iamcco/markdown-preview.nvim", cmd = { "MarkdownPreviewToggle", "MarkdownPreview", "MarkdownPreviewStop" }, ft = { "markdown" }, build = "cd ~/.local/share/nvim/lazy/markdown-preview.nvim/app && npm i", lazy = true, config = function() vim.g.mkdp_browser = "vivaldi-stable" end,}See that I don’t have an opts property, but I’m using the config to automatically set the global option of which browser the markdown preview will use. I could have set this in options.lua, but since this is directly related to this plugin and without it this configuration doesn’t make sense, I preferred to set it here.
Another example is my Telescope configuration:
return { "nvim-telescope/telescope.nvim", opts = { defaults = { path_display = { shorten = { len = 5, exclude = { 2, -1 }, } }, }, },}I’m passing the options as a table that’s saying to telescope to reduce the path size to 5 letters and exclude both the second part of the path and the last part of it. This makes the searches look like this:
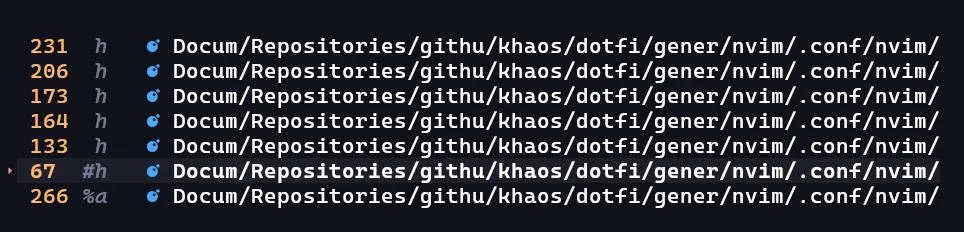
Which is great for small screens, since I don’t need to know the full name of the location, just the first letters.
My plugins#
I’m not going to list all my plugins here, because there would be too many, but I’ll leave my dotfiles directly in the Lazy folder so you can see what’s happening. I chose to divide the plugins by type and function, not by group as the community seems to like to do. I find it much easier to maintain when I know what the plugin does instead of having a file with several plugins inside grouped by functionality.
dotfiles/general/nvim/.config/nvim at ba88235f73d88a5a3e0db981e2efbc433c5fee4c · khaosdoctor/dotfilesMy dotFiles. Contribute to khaosdoctor/dotfiles development by creating an account on GitHub.khaosdoctorSo that we can have the functionality I promised, getting your nvim looking like mine (at least in appearance), we’ll need some plugins. The first one is my color scheme.
Catpuccin and colorschemes#
In general, installing themes for Nvim is pretty simple and you can switch themes in LazyVim using <leader>UC. To install a colorscheme, it’s like we’re installing a common plugin, but at the end of the file we have to set a property that tells LazyVim which plugin we’re choosing as the main colorscheme. I have some themes installed:
return { { "Mofiqul/dracula.nvim" }, { "catppuccin/nvim", opts = { flavour = "macchiato", highlight_overrides = { all = function(colors) return { CurSearch = { bg = colors.sky }, IncSearch = { bg = colors.sky }, CursorLineNr = { fg = colors.blue, style = { "bold" } }, DashboardFooter = { fg = colors.overlay0 }, TreesitterContextBottom = { style = {} }, WinSeparator = { fg = colors.overlay0, style = { "bold" } }, ["@markup.italic"] = { fg = colors.blue, style = { "italic" } }, ["@markup.strong"] = { fg = colors.blue, style = { "bold" } }, Headline = { style = { "bold" } }, Headline1 = { fg = colors.blue, style = { "bold" } }, Headline2 = { fg = colors.pink, style = { "bold" } }, Headline3 = { fg = colors.lavender, style = { "bold" } }, Headline4 = { fg = colors.green, style = { "bold" } }, Headline5 = { fg = colors.peach, style = { "bold" } }, Headline6 = { fg = colors.flamingo, style = { "bold" } }, rainbow1 = { fg = colors.blue, style = { "bold" } }, rainbow2 = { fg = colors.pink, style = { "bold" } }, rainbow3 = { fg = colors.lavender, style = { "bold" } }, rainbow4 = { fg = colors.green, style = { "bold" } }, rainbow5 = { fg = colors.peach, style = { "bold" } }, rainbow6 = { fg = colors.flamingo, style = { "bold" } }, } end, }, color_overrides = { macchiato = { rosewater = "#F5B8AB", flamingo = "#F29D9D", pink = "#AD6FF7", mauve = "#FF8F40", red = "#E66767", maroon = "#EB788B", peach = "#FAB770", yellow = "#FACA64", green = "#70CF67", teal = "#4CD4BD", sky = "#61BDFF", sapphire = "#4BA8FA", blue = "#00BFFF", lavender = "#00BBCC", text = "#ffffff", subtext1 = "#A3AAC2", subtext0 = "#8E94AB", overlay2 = "#7D8296", overlay1 = "#676B80", -- overlay0 = "#464957", -- comments overlay0 = "#757a92", surface2 = "#3A3D4A", -- surface1 = "#2F313D", -- line numbers, hovers, highlights surface1 = "#46495b", surface0 = "#1D1E29", base = "#030303", mantle = "#11111a", crust = "#191926", }, }, integrations = { telescope = { enabled = true, style = "nvchad", }, }, }, name = "catppuccin", priority = 1000, }, { "eldritch-theme/eldritch.nvim", lazy = false, priority = 1000, opts = {} }, { "maxmx03/fluoromachine.nvim", lazy = false, priority = 1000, opts = { glow = false, theme = "fluoromachine", transparent = false }, }, { "shatur/neovim-ayu", lazy = false, priority = 1000, config = function() require("ayu").setup({ mirage = true, terminal = true, }) end, }, { "LazyVim/LazyVim", opts = { colorscheme = "catppuccin", }, },}As you can see, I’m a big fan of dark themes, really dark. For me, the ideal are themes that have high contrast between the background and the font. For example, many people use the Dracula theme (from our countryman Zeno Rocha) because it’s a great theme, but for me, the original Dracula didn’t appeal to me because of the background color choice. I always used Dracula, but I always modified the background color of the editor to be almost black (#131313 to be exact).
In Lazy, I discovered another theme that came closer to what I liked, the Catppuccin. One of the big advantages of this theme for me is that it has colors very similar to Dracula’s, which I think are very cool, but it’s also darker. But I still made it EVEN DARKER.
In the case of Catppuccin, you can change the colors of each part of the theme using color_overrides. Besides that, you can also set the “flavour” or “flavor” of the theme. I prefer the “macchiato” which is the darkest. Plus, you can change which color goes where and how it’s defined. I strongly recommend this theme.
Above all, it’s your choice, so it’s not something you need to think too much about. I recommend that you install several themes and test each one to see which one you like best! What’s important is that, at the end of it all, you have this call:
{ "LazyVim/LazyVim", opts = { colorscheme = "your theme", }, }Dashboard#
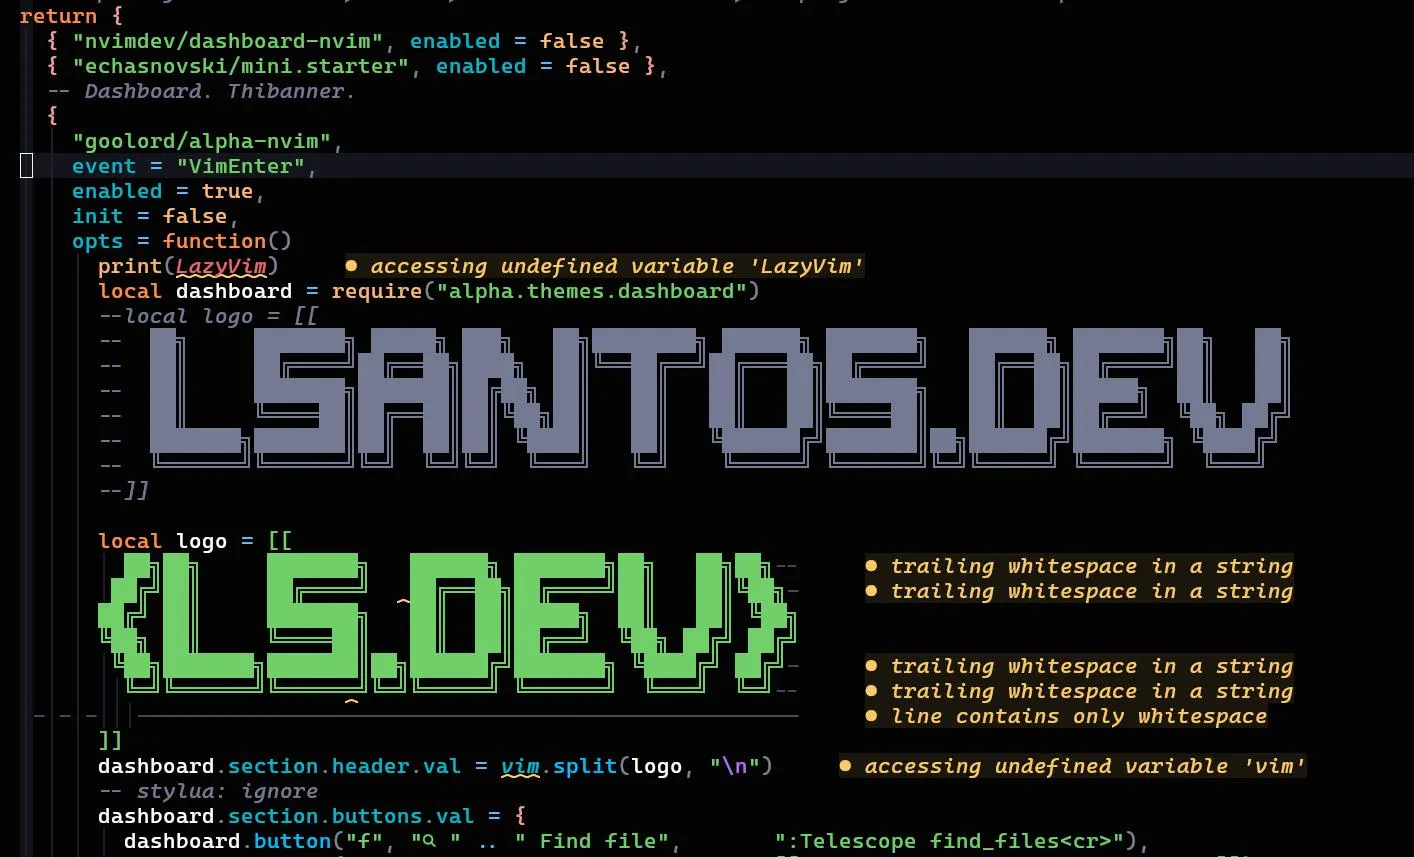
To have a customized dashboard with a different logo and even different options, Lazy uses a project called Alpha.nvim, which is a dashboard generator. Essentially, what I did was copy the original configuration from LazyVim that’s in this repository:
LazyVim/lua/lazyvim/plugins/extras/ui/alpha.lua at main · LazyVim/LazyVimNeovim config for the lazy. Contribute to LazyVim/LazyVim development by creating an account on GitHub.LazyVimAnd modify the logo. Everything else I left the same because I think the options are very relevant and help me a lot. To generate the logo, I looked for an ASCII art generator. This one was exactly the one I used. It has several font and letter options and then it’s just a matter of being creative. To replace the logo, just remove the Lazy logo and paste your own logo, remembering that your terminal must support ANSI characters if you chose that font:
LuaLine#
Lualine is a really cool plugin that adds several interesting things to the bottom of your editor, like the git branch, the folder you’re in, number of errors and warnings, path, last command, and other things. Besides that, it’s completely customizable and you can add whatever you want to it. In my case, this is the configuration:
To not add a super long file here, I’ll leave the link to the repository in the current revision:
dotfiles/general/nvim/.config/nvim/lua/plugins/lualine.lua at 4532db19eca517ccc6205fa22826aa8854d88d20 · khaosdoctor/dotfilesMy dotFiles. Contribute to khaosdoctor/dotfiles development by creating an account on GitHub.khaosdoctorConclusion#
It was a long article but now you can install and configure your Neovim to start using the power it has. We’re far from being ready and finishing all this configuration, but what’s important is that you feel that this editor is your editor and you feel at home with it.
I still want to show you much more here related to Neovim and how I personally use this editor, plus show everything I’ve learned over time (and continue to learn) using Vim. But that’s for another time!
If you liked this article, send me a hello on my social media and tell me what you want to see more here on the blog!