From zero to automation with GitHub Actions in 7 minutes
In a previous article, I discussed how we could create a complete GraphQL backend using only a Docker image and a configuration file. All of it hosted on Azure. Now let’s learn how to automate the deployments to our hosting and automatically update our backend!
This entire project aims to create a backend for my future content archive that will be on my site. But whenever I update the backend or change the GraphQL schema, I’ll have to redeploy the entire service.
Instead, I wanted every push to my master branch to generate a new version of the file and send the update to Azure. But I didn’t want to use additional tools for this. I wanted to keep the entire stack as simple as possible. Since we were already using only GitHub and Azure, it made sense to stick with GitHub for automation.
That’s why we’ll use GitHub Actions
Like other CI providers such as Travis or Circle, GitHub also has a repository integration and automation system. The advantage of this system compared to others is that you’re already in the same repository and already within the same tool.
The project we’ll use to automate is my public backend repository:
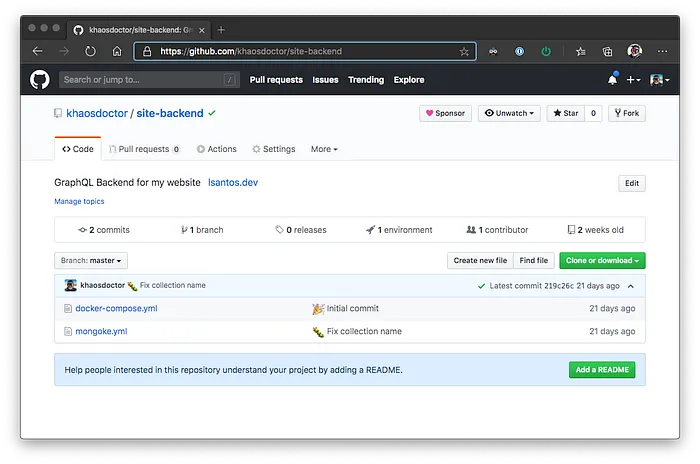
As you can see, the repository is quite simple. It doesn’t contain many files, just a docker-compose.yml for local testing and our mongoke yml file which will be the GraphQL schema.
At the top of the page, next to settings, we have the Actions button. That’s where we’ll configure our automation!
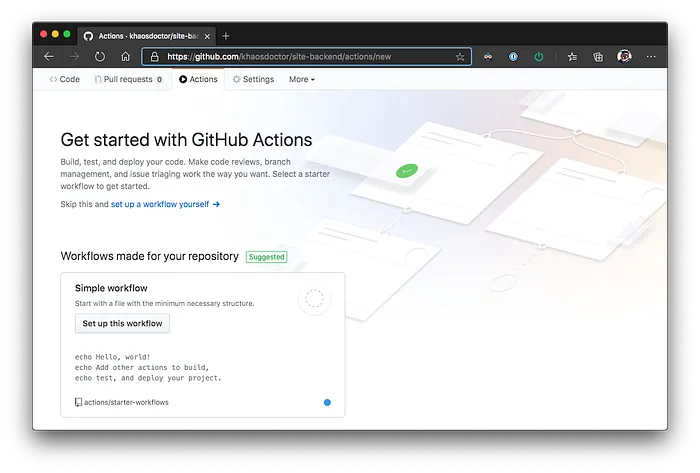
GitHub already has a series of ready-made workflows, but unfortunately, we don’t have one for what we want to do. But what do we want to do? To make everything clearer, let’s list all the steps of the process:
- We receive a push on the
masterbranch - We connect to Azure through a service principal and an action called Azure/login
- Then we’ll use the Azure/cli action to execute our container deployment command
Some details we need to notice:
- The GitHub Pages cache is quite long, so we’ll need to generate a random number or a fingerprint to add to the URL of our Mongoke YAML file
- We have a MongoDB URI that must be a secret
Creating a secret#
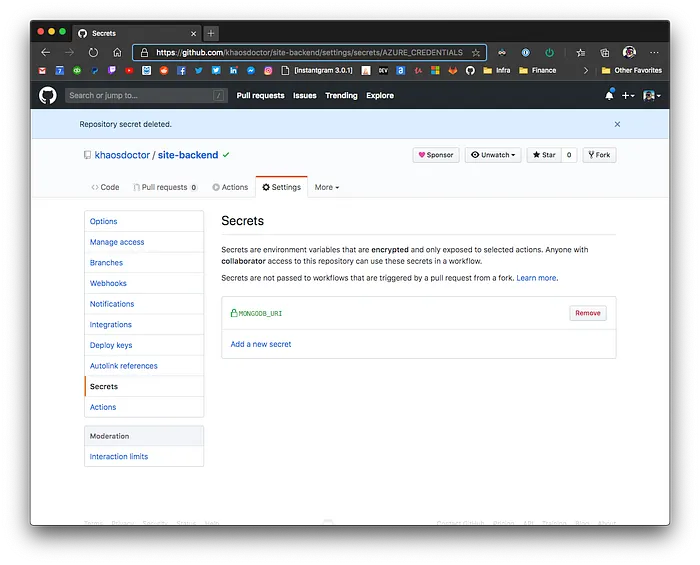
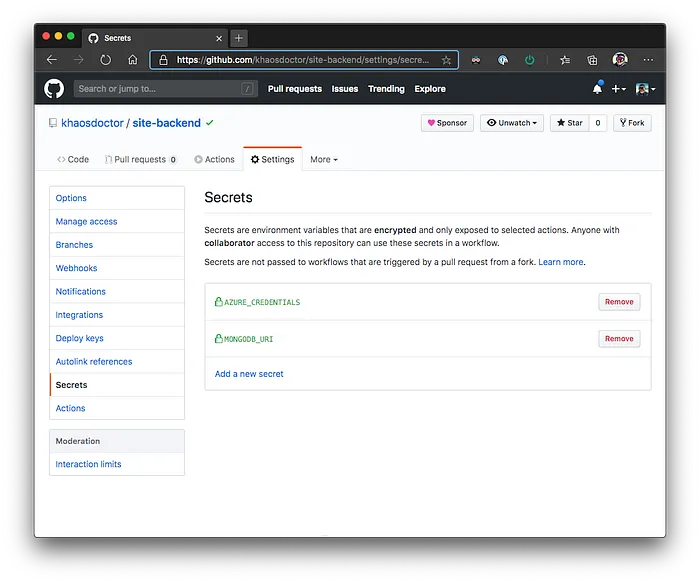
First, let’s handle our dependencies. The easiest dependency to resolve is creating the MongoDB URL as a secret. To do this, we go to our Settings tab and click on Secrets. Just add a new secret by clicking the Add new Secret link and fill in a name and its content. In our case, we’re adding the MongoDB URI, so we’ll call this secret MONGODB_URI
Allowing actions on Azure#
To allow GitHub to execute actions on our behalf on Azure, we need to create a Service Principal. This resource gives us an application account so we can allow other people or services to connect to our portal and perform actions on our behalf.
To create this resource, we’ll use the Azure CLI. After logging in with the az login command, just run the following command:
To get your subscription ID, just run the az account list command and look for the id key of the subscription that has the isDefault key marked as true. You can also give any name to your Service Principal. Make it descriptive so you know who you’re granting permissions to.
Finally, another important detail is to only grant permissions to necessary resources. That is, we won’t create a Service Principal for the entire account, but only for the Resource Group we need. In my case, this RG is called personal-website and is where I’m grouping all resources related to my site.
This command should give a JSON response like:
Copy this entire response and create a new secret in GitHub called AZURE_CREDENTIALS:
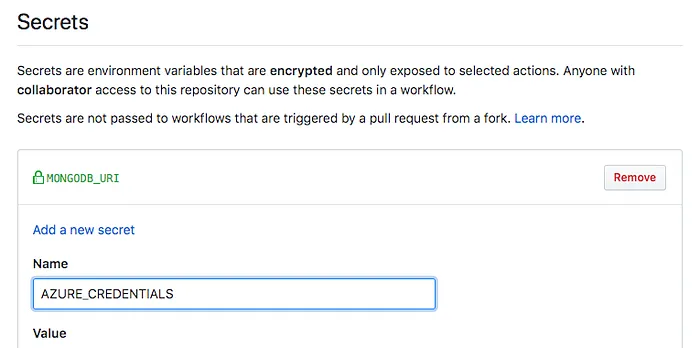
Now we should have two secrets created:
Creating a workflow#
To create our first workflow, we just go back to the Actions panel next to Settings and click the Set up this workflow button:
This action should take you to a new screen with an initial code template:
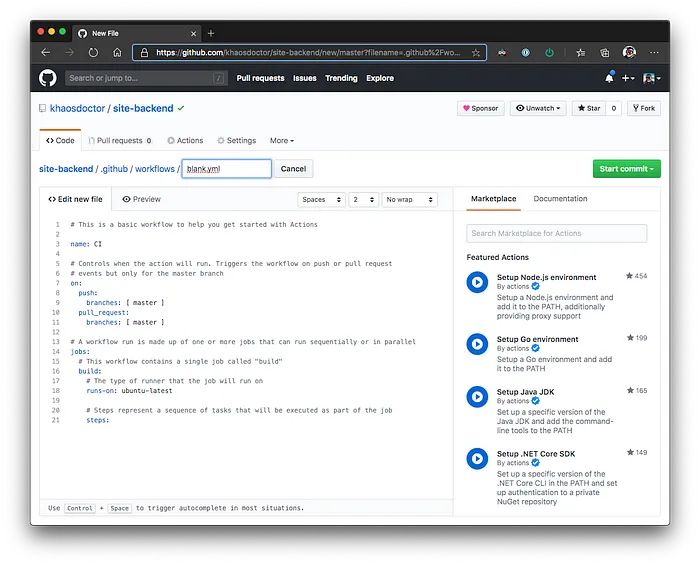
Notice that GitHub Actions are just YAML files that sit in a <your repo>/.github/workflows folder, and this will be the name of the workflow. Therefore, it’s important that it be quite descriptive. Let’s name ours publish-prod.yml:

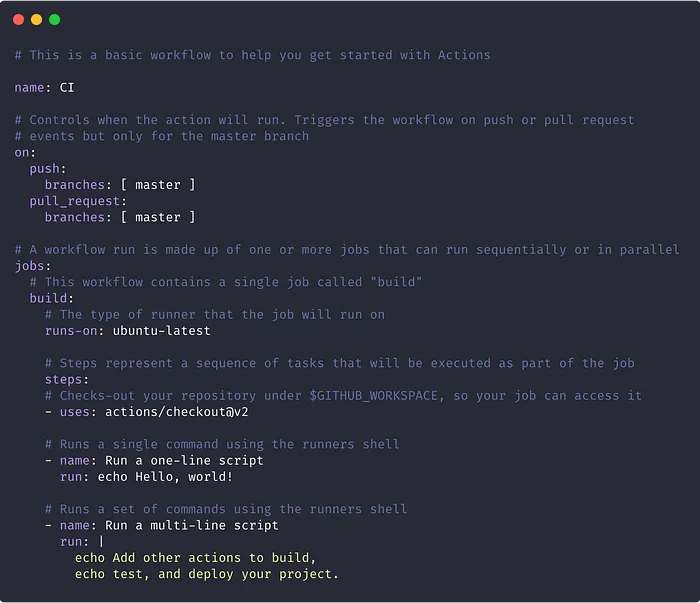
The content we have is as follows:
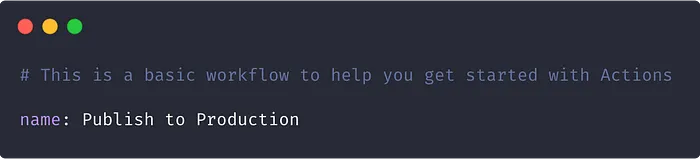
First, let’s set a name for our workflow. This will be the name that appears in the GitHub UI, so we can make it a bit prettier:
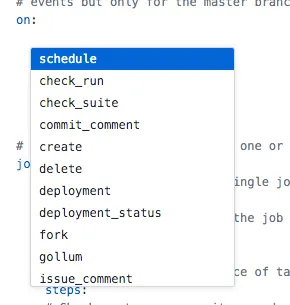
Now let’s define what type of action we want it to run on. Since we want it to run on any push or PR on the master branch, we won’t make any changes. But if we needed to change this action, we’d have to change the on key. To check what actions are available, just click on the editor and press ENTER and an intellisense will be shown:
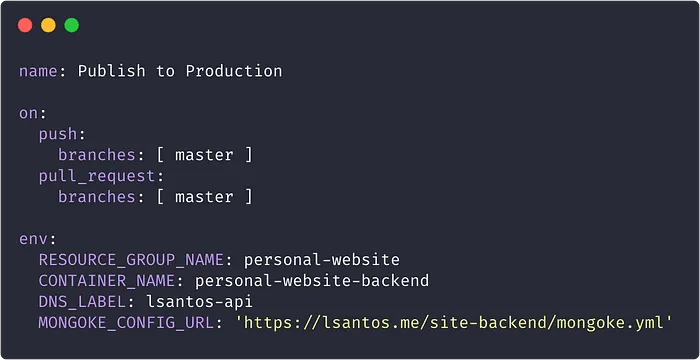
So let’s create a section to share environment variables and contents that we’ll use later in our script, for example, the container name and also the resource group name. For this we create an env block:
Now let’s actually create the machine and what we call a runner, which is what will run our test and publishing code. Every workflow is made up of one or more jobs that can be executed sequentially or in parallel. In our case, we don’t have to do much, just connect and deploy. So we’ll modify the jobs section:
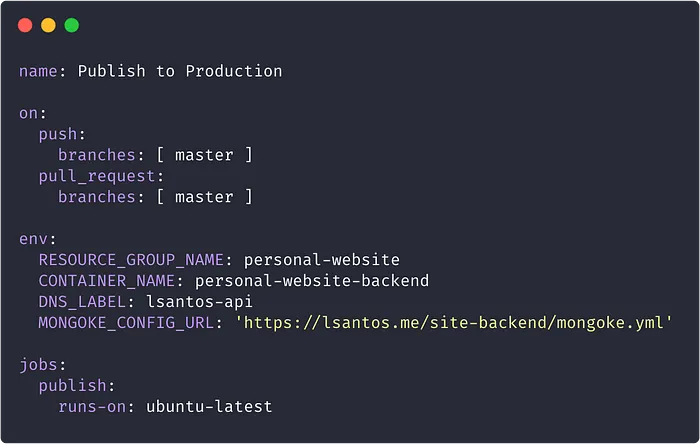
We’ll run our job on an Ubuntu image. See the other options in the documentation. After that, we’ll configure our steps. A step is a sequence of tasks that will be executed as part of a job. That is, this is where we’ll run our login and our deployment!
To do this, we’ll modify the steps key and remove all the content. Then we’ll use the ready-made steps from Azure to do the login! We can search for Azure/login in the sidebar text box:
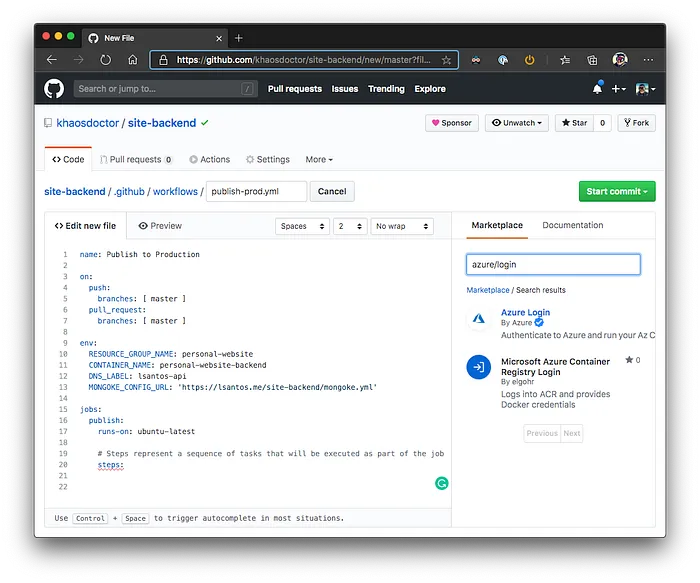
When clicking on the step name, we’ll have a tutorial on how to use it. In this case, it’s quite simple. Just copy the following code into our step:
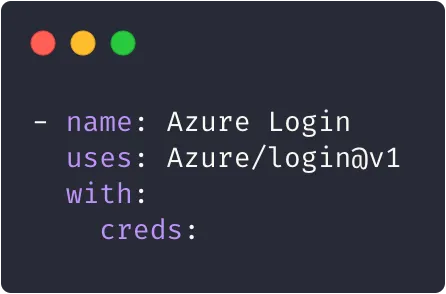
And this is where we’ll set our first secret. We need the AZURE_CREDENTIALS we created earlier to provide the access credentials for login. To use a secret, just put it in double curly braces like: ${{ secrets.AZURE_CREDENTIALS }}.
Our file looks like this:
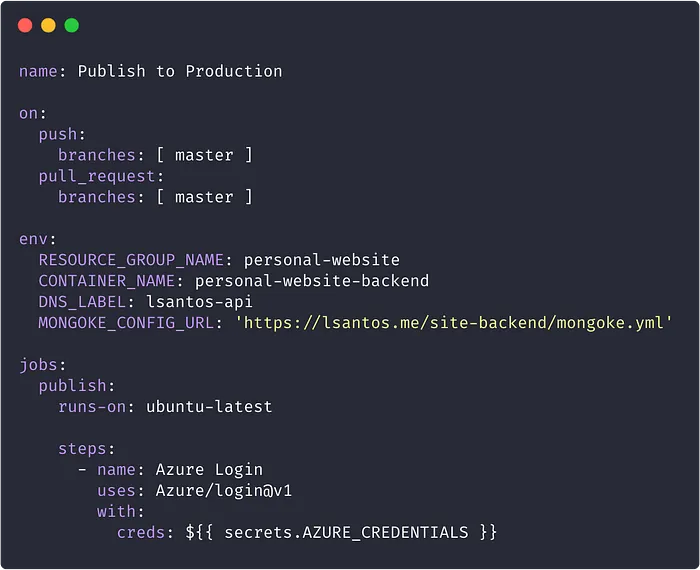
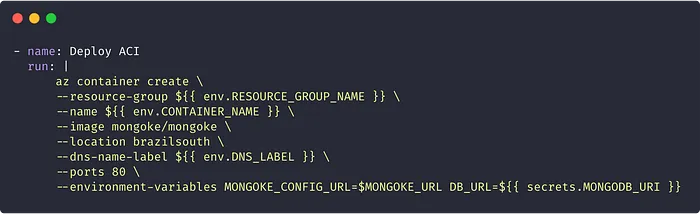
Let’s create a second step that we’ll call Deploy ACI. This is where we’ll run our Azure CLI command. To do this, we’ll use another step with the run command that will contain the line we’ll execute in our CLI. In our case, with the variables already substituted, it will be this:
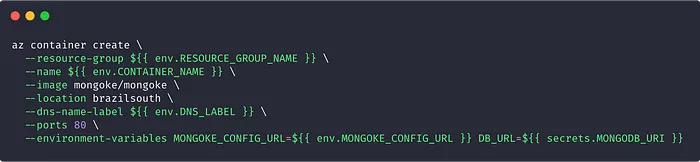
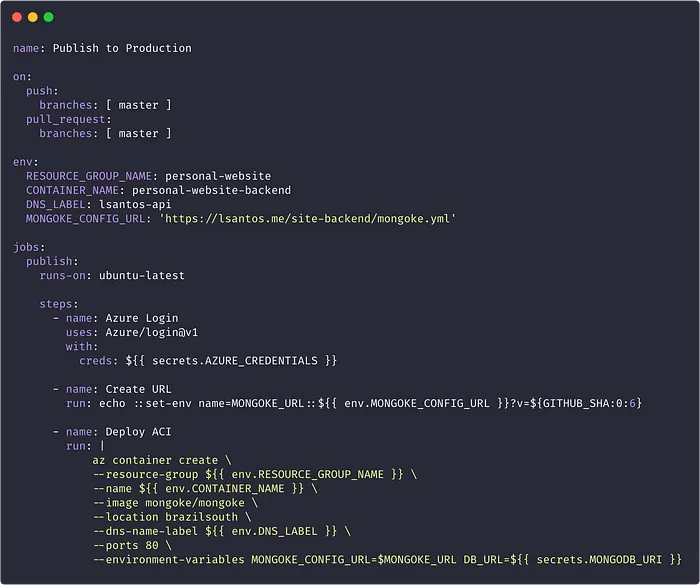
Let’s pay close attention to the last part where we create the MONGOKE_CONFIG_URL variable. This variable alone won’t be enough. We need to concatenate it with the commit SHA value so we don’t suffer from caching. To concatenate variables, we have to work only at the step level, since expressions aren’t allowed at the job or workflow level. So let’s create another step and call it Create URL.
In this step, we’ll execute a Workflow Command, which are native GitHub Actions commands that can be accessed with the ::command syntax. In our case, we’ll use the set-env command, which is used to create a new environment variable. The syntax is as follows: ::set-env name=<name>::<value> and then we can use concatenation expressions:

Notice that we’re concatenating ${{ env.MONGOKE_CONFIG_URL }} with ?v= and taking the first six digits of a native environment variable called GITHUB_SHA. Let’s add this step after the login:
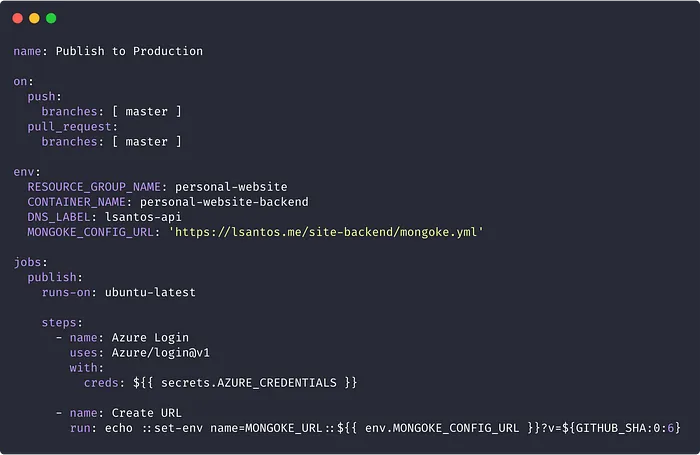
Now let’s move to the last step, where we’ll run our command with a small change. Instead of using the MONGOKE_CONFIG_URL variable, we’ll switch to our new MONGOKE_URL variable:
Our final file will look like this:
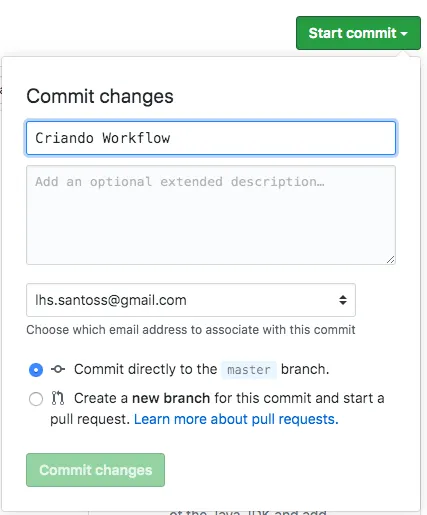
Now we can click the Start Commit button and wait for our action to execute:
Tracking the workflow#
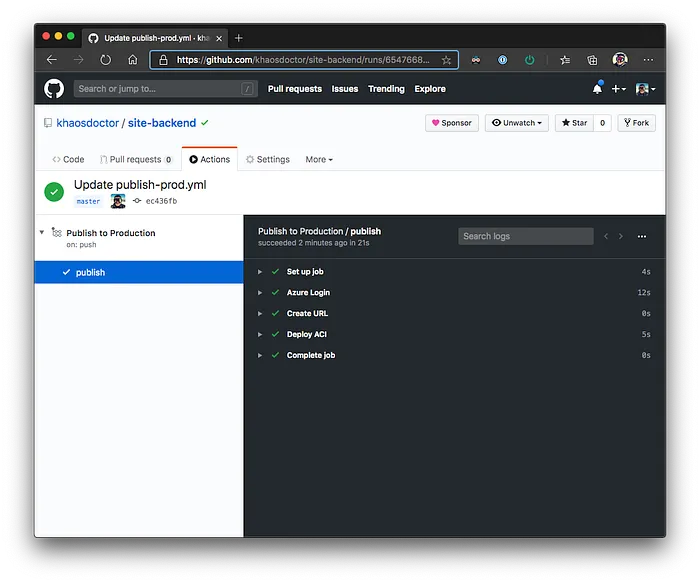
We can track our workflow in the Actions tab:
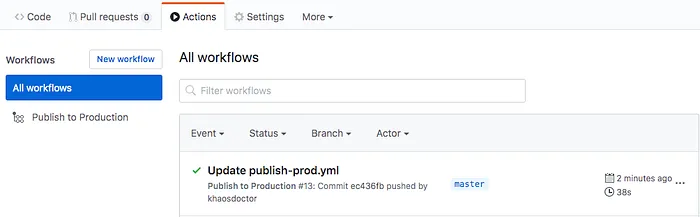
Remember that workflows that haven’t run won’t appear in the list. Just click on the workflow name to see what happened:
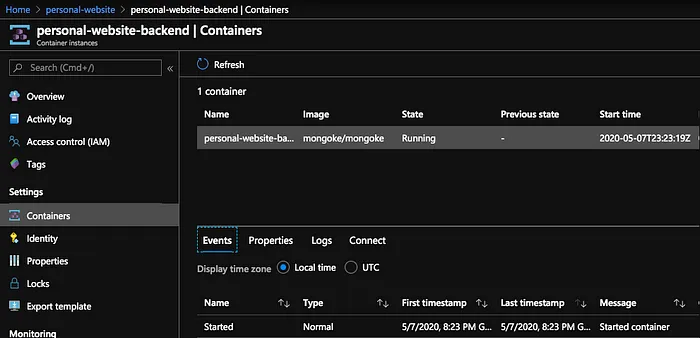
Now we can see in the Azure portal that our container has been updated:
And our URLs are also correct:

Conclusion#
In 7 minutes, we automated the entire deployment process of our application to Azure. Without realizing it, we saved a lot of time with a simple and quick action that can be done in just a few minutes!
In future articles, we’ll explore GitHub Actions even more for other tools and distributed application models!
Make sure to follow more of my content on my blog and subscribe to the newsletter to receive weekly updates!
Footnotes#
-
Notice that we have several possible actions. For more details, see the official documentation. ↩