Controlling containers from inside your application with ContainerD
As we discussed in the previous article, Kubernetes recently deprecated Docker, meaning we can’t use Docker integration directly from inside a Pod unless we install it manually.
In that same article, I talked about what this means for the ecosystem and introduced the Open Container Initiative (OCI), which is responsible for creating the standard that container runtimes follow to execute the same type of image. All OCI-compatible images can be executed by any runtime that is also compatible, which opens doors to the creation of different runtimes.
Now, let’s understand how we can use ContainerD to integrate with our applications and run containers without needing Docker or any communication with it.
ContainerD#
Like CRI-O, Docker Engine, and RKT, ContainerD is a container runtime, meaning it’s the tool that manages the entire lifecycle of a container, from downloading an image to creating network interfaces, supervision, and storage.
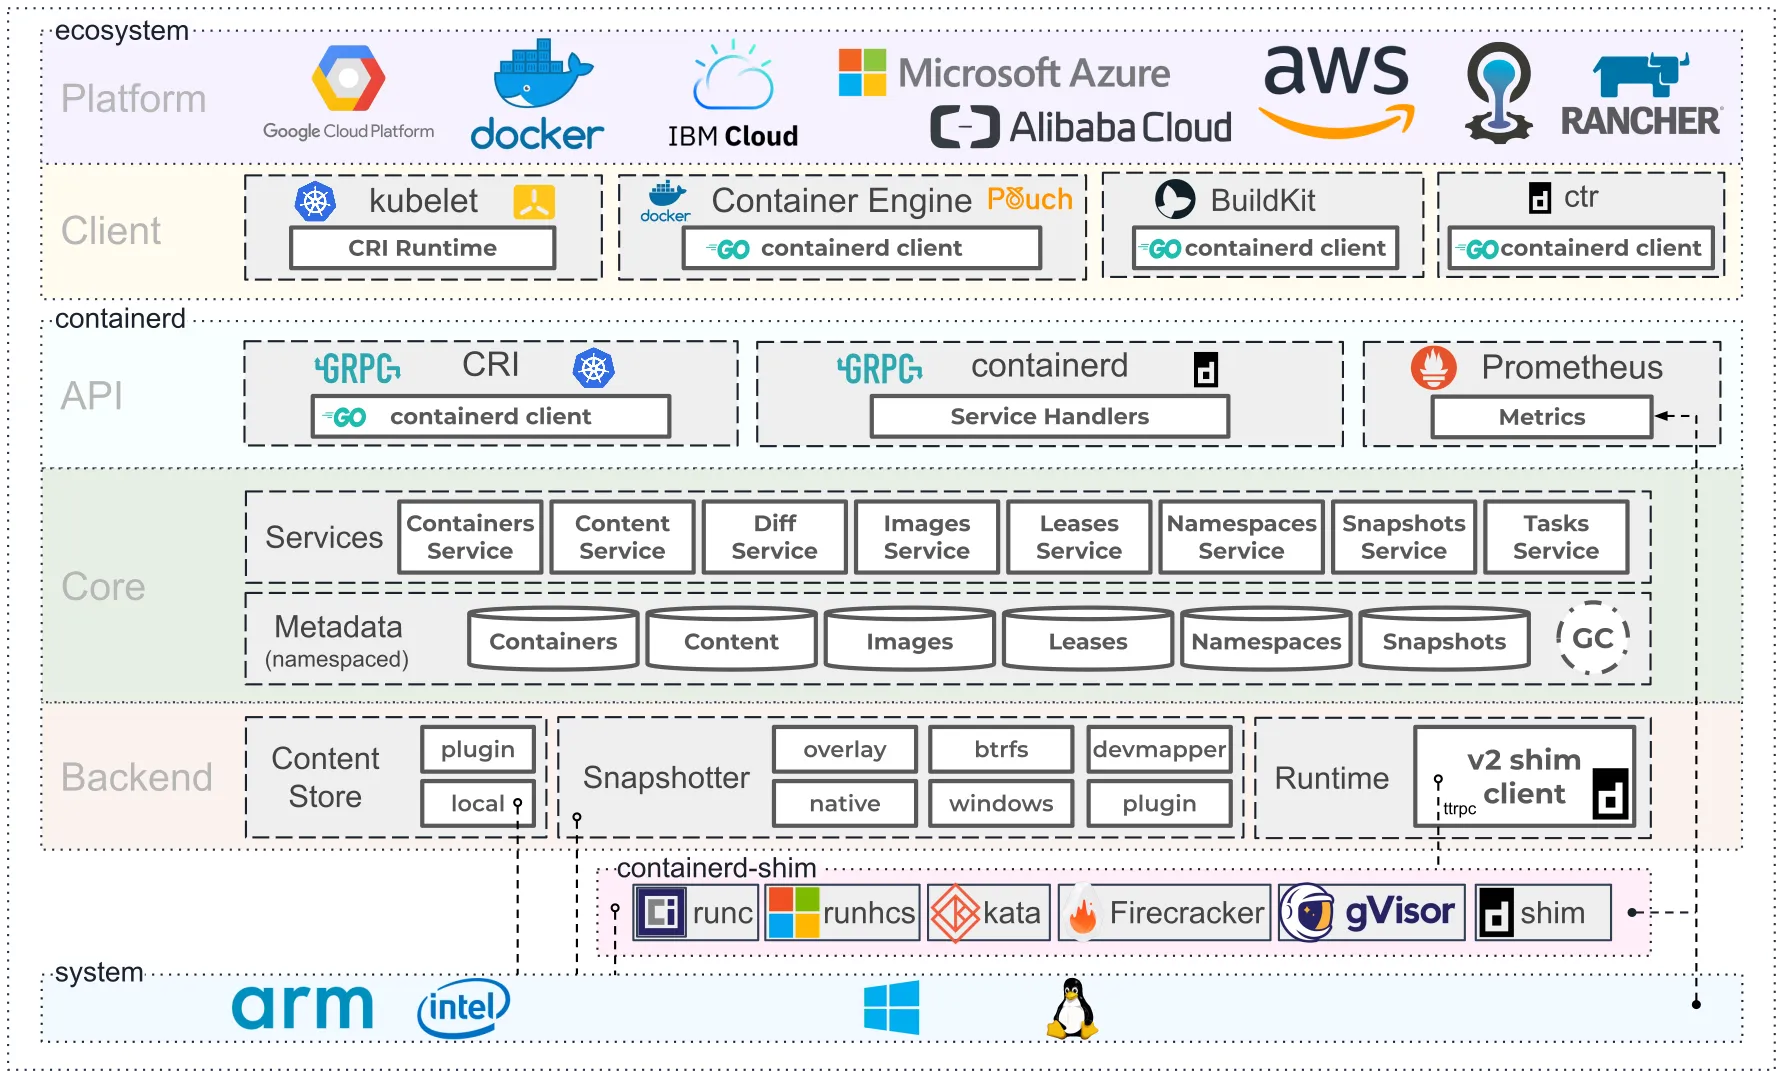
This means we can take any image that is compatible with the OCI specification and run it using ContainerD. So if everything is compatible, why don’t we just use Docker directly?
For the same reason that Kubernetes deprecated Docker support. As much as we might want an application like Docker, it’s still entirely focused on users and user interaction with the tool. In other words, Docker is a tool made to be used by people, not machines.
With ContainerD, we can integrate container management into our code because it doesn’t have a user interface. And that’s exactly what we’re going to do here.
Preparativos#
Before we can run our image using ContainerD, we’ll need to prepare a machine to run the tool. The ctr (ContainerD’s CLI) only runs in environments that have the OCI runc implementation installed, and unfortunately, this implementation only exists for Linux.
Criando uma VM#
In my case, I’m using a Mac, and if you’re in any environment other than Linux (like Windows), you’ll need a virtual machine, or you can use WSL2 on Windows. I went with the first option and created a virtual machine using VirtualBox and the Ubuntu 18.4 netboot image (just because it’s lighter and faster to download).
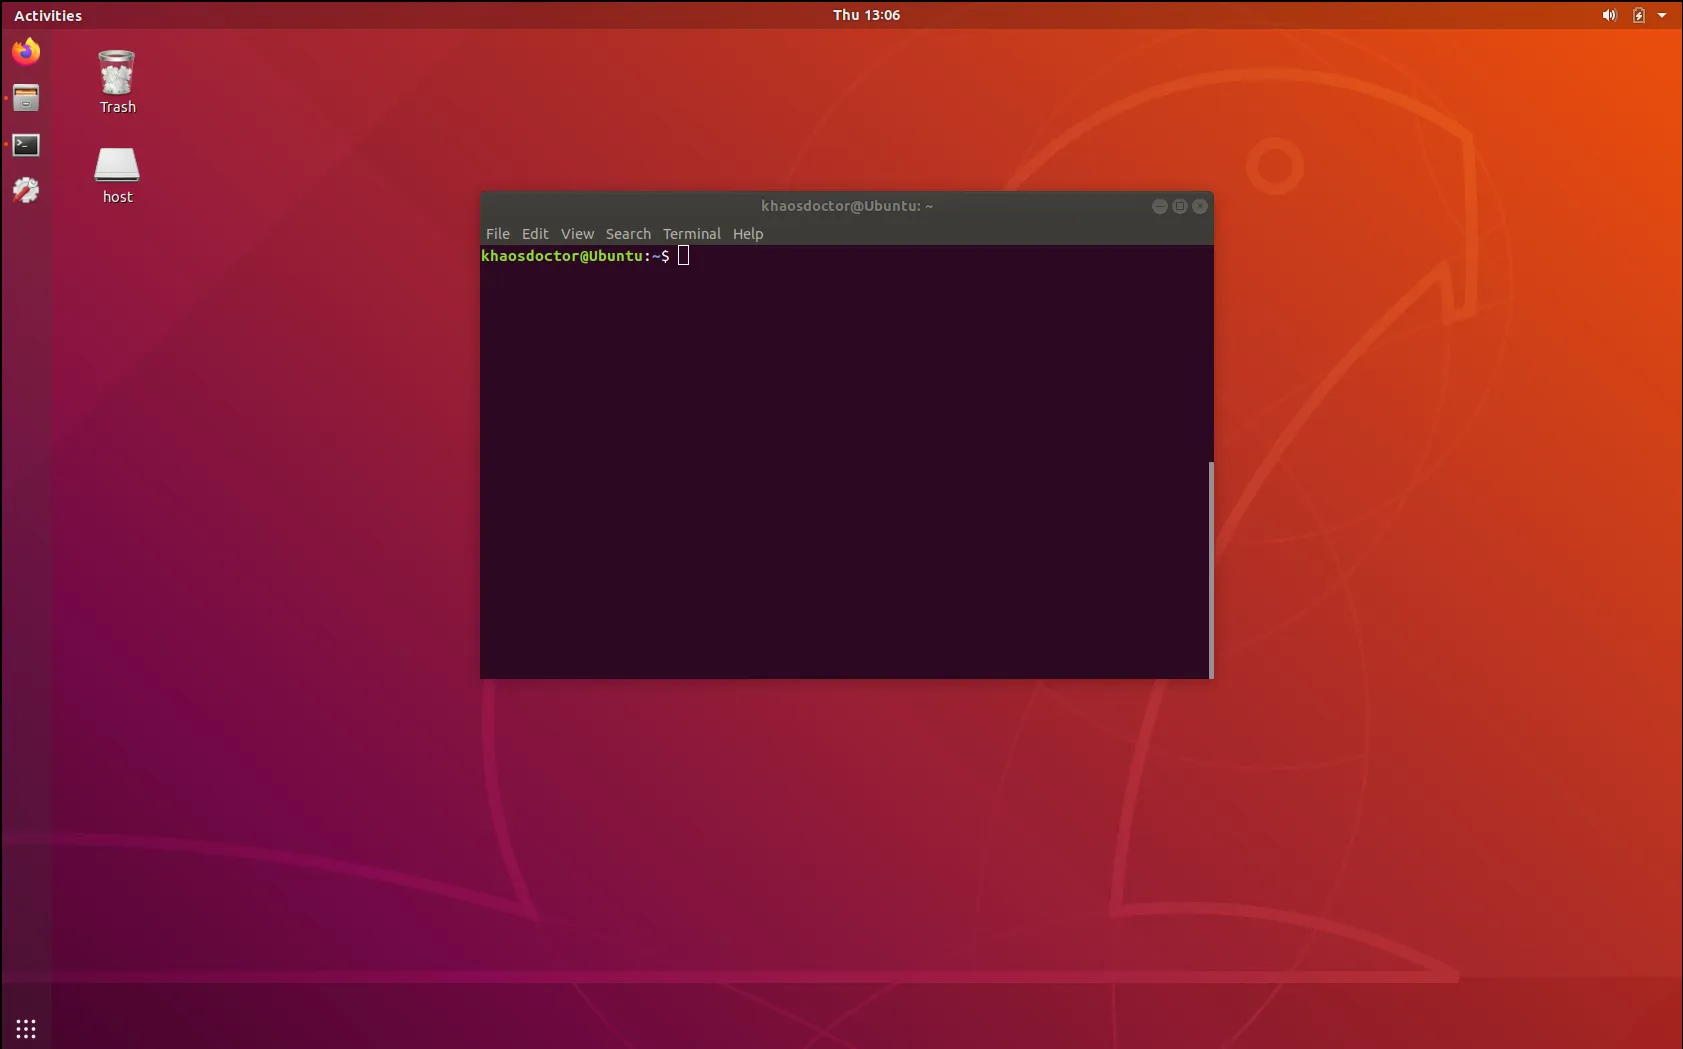
Note: If you want to install Ubuntu using the same image I used, select your system architecture (x86, amd64, arm, etc.) from the link above and download the file called
mini.iso. From there, run the image in VirtualBox.
If you’re using Linux or one of its distributions, then this step is not necessary, and you can skip directly to installing runc.
Note 2: I won’t go into detail about how to install the virtual machine or how to run Ubuntu in this article, as there are several amazing articles and tutorials on the internet about the same topic that are easy to find.
After creating the virtual machine, we’ll install the Go programming language on the machine.
Instalando o Go#
In this example, we’ll integrate our Go application with ContainerD and take the opportunity to compile runc (another required dependency) directly from source.
I’m using the Ubuntu 18.4 Linux distribution, so the installation can be done using Snap or a Tar file. You can find all options in the documentation. In my case, I installed it using Snap with the following command:
sudo snap install go --classicFor this tutorial, I’m using version 1.15.6:

Let’s create a folder anywhere (I chose ~/gopath) to create our $GOPATH, then open our .bashrc file and add the following line:
export GOPATH=~/gopathexport PATH=$PATH:$GOPATH/binThen we’ll save and run the source .bashrc command to load the changes. Next, we’ll create the correct directories using the following command:
mkdir -p $GOPATH/src/github.comBut do I need to know Go?
Not necessarily. ContainerD has a CLI that you can use for command-line communication.
In addition, ContainerD also has a gRPC API that allows you to communicate directly with the service’s socket and call the necessary RPCs, as Mark Kose did here with the browser (though he used Envoy to communicate with the socket) and here using Java with gRPC.
So, extrapolating the concept a bit (but not too much), it’s possible to use any language supported by gRPC to connect to the ContainerD socket at containerd.sock. It’s very similar to what we do with integration using docker.sock. However, unfortunately, there’s no native client except the one written in Go.
Instalando o runc#
runc is an open source project made by the OCI, and you can find the official repository here. We can install it in several ways:
- Downloading a release from the releases list and putting it in a folder that’s in your
$PATHvariable - Cloning the repository and running
make, as described in the README. - Using
go get
The easiest way is definitely to use option 3, since option 1 requires knowing some information about our system and option 2 might cause problems depending on the architecture. Since we have Go installed, we’ll just install runc as a new package.
Run the following command to download and install runc:
go get github.com/opencontainers/runcAfter a while, check if there’s a binary called runc in the $GOPATH/bin folder. Try running the runc --version command to get an output similar to this:

Otherwise, generate the binary yourself by going to the download folder with cd $GOPATH/src/github.com/opencontainers/runc and running the command make && sudo make install.
Instalando o ContainerD#
To install ctr, the ContainerD CLI, on our virtual machine, in the case of Ubuntu it’s simply running the command sudo apt install containerd -y, for other systems see the downloads page.
If everything went well, you’ll be able to run the ctr version command to show the CLI version number.
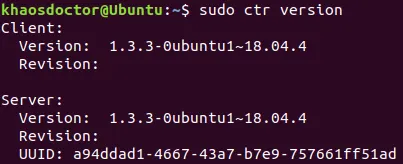
If you’re having trouble running the
ctr versioncommand with a “Permission Denied” message when reading thecontainerd.sockfile at/run/containerd, run the command withsudo.
Additionally, ContainerD can also be used with Systemd as a Daemon service. To check if everything is correct, use the command sudo systemctl status containerd, and you should get output indicating that the ContainerD daemon is installed and running.
If you want to be more sure, run the command ps -fC containerd and see the processes appearing in the system’s process list:
UID PID PPID C STIME TTY TIME CMDroot 23133 1 0 14:23 ? 00:00:02 /usr/bin/containerdroot 23666 23643 0 14:42 ? 00:00:00 containerdUsando sem precisar de sudo#
To remove the need to use sudo when running ctr, we can modify the daemon configuration file located at /etc/containerd/config.toml. By default, the file is not generated, so we need to create a base file. To do this, we’ll create the directory and run the native containerd command to generate a base file.
sudo mkdir -p /etc/containerdsudo containerd config default > /etc/containerd/config.tomlThis command will generate a file similar to this one in /etc/containerd:
version = 2root = "/var/lib/containerd"state = "/run/containerd"plugin_dir = ""disabled_plugins = []required_plugins = []oom_score = 0
[grpc] address = "/run/containerd/containerd.sock" tcp_address = "" tcp_tls_cert = "" tcp_tls_key = "" uid = 0 gid = 0 max_recv_message_size = 16777216 max_send_message_size = 16777216
[ttrpc] address = "" uid = 0 gid = 0
[debug] address = "" uid = 0 gid = 0 level = "debug"
[metrics] address = "" grpc_histogram = false
[cgroup] path = ""
[timeouts] "io.containerd.timeout.shim.cleanup" = "5s" "io.containerd.timeout.shim.load" = "5s" "io.containerd.timeout.shim.shutdown" = "3s" "io.containerd.timeout.task.state" = "2s"
[plugins] # OmittedLet’s find our user ID and group ID. To do this, type the id command on the command line and copy the uid and gid IDs. In my case, both are 1000:
uid=1000(khaosdoctor) gid=1000(khaosdoctor) groups=1000(khaosdoctor),4(adm),24(cdrom),27(sudo),30(dip),46(plugdev),117(lpadmin),124(sambashare),999(vboxsf)Now open the file and let’s edit the [grpc], [ttrpc], and [debug] sections of the TOML file. Replace the uid and gid properties from 0 to your user and group number, like this (remembering that mine were 1000):
[grpc] address = "/run/containerd/containerd.sock" tcp_address = "" tcp_tls_cert = "" tcp_tls_key = "" uid = 1000 gid = 1000 max_recv_message_size = 16777216 max_send_message_size = 16777216
[ttrpc] address = "" uid = 1000 gid = 1000
[debug] address = "" uid = 1000 gid = 1000 level = "debug"Save the file and close the editor. Now run sudo systemctl restart containerd and then sudo ls -l /run/containerd and verify that the containerd.sock file is under your username and group.

Usando o ctr#
The first step to using ContainerD is understanding ctr. Just like Docker works with command lines, we have the ability to create and manage containers in a more controlled way with ctr.
First, we need to create a namespace. Namespaces are logical separations in the system that allow different users on the same system to work without conflicts. To do this, we’ll run the ctr namespaces create command:
ctr namespaces create lsantos # I'm creating a namespace called "lsantos"We can see the created namespaces with the ctr namespaces ls command:
NAME LABELSlsantosFinally, we can download our first image. As a test, I’ll download a custom image that contains a small Node.js API that responds with “Hello World” to everyone who accesses a specific port. Let’s run the command below to download the image:
ctr images pull docker.io/khaosdoctor/simple-node-api:latestAnd then we can list the images with ctr images ls:
REF TYPE DIGEST SIZE PLATFORMS LABELSdocker.io/khaosdoctor/simple-node-api:latest application/vnd.docker.distribution.manifest.v2+json sha256:587747676c8aa6e26e2c7f3adf8c76c5653e63e96af6510fbf12357be4fcd0f3 254.1 MiB linux/amd64 -Now that we have our image downloaded, let’s run it. The ctr commands are very similar to Docker commands. Let’s run the following command:
sudo ctr run \ --net-host \ --rm \ --env PORT=8080 \ docker.io/khaosdoctor/simple-node-api:latest \ simple-apiAnd we have a container running:
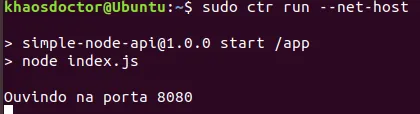
Let’s go through the command part by part:
sudo ctr run: This is the command that tells ContainerD to create a container from a filesystem or image--net-host: Allows us to access the container’s network through the host (so we can access our API)--rm: Like in Docker, removes the container after running--env PORT=8080: We create an environment variable inside the container calledPORTwith the value8080, as the image documentation saysdocker.io/khaosdoctor/...: We specify which image we want to runsimple-api: We give the container a name, which can be anything
Now we can go to localhost:8080 in the browser and see the magic happen!
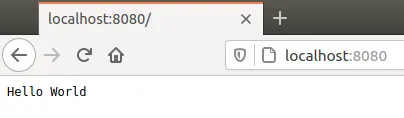
Congratulations! You just created your first container without needing Docker!
Integrando com a API do ContainerD#
Now we move to the second part, where we do all this but without any command line or CLI help. We’ll write a Go application so we can integrate directly with containerd.sock and issue commands through its gRPC interface.
The great advantage of using Go for this type of action is that we have the native client directly from the source, since ContainerD is written in Go. So everything becomes much easier!
The example we’re doing here is very similar to the example on the lib’s website, but we’ll simplify it a bit more so we can execute what we did before through ctr.
First, I’ll create a directory anywhere on my VM (if you’re using VirtualBox, take a look at the “Shared Folders” option). I decided to call my directory containerd, and inside it I created another folder called src.
Criando um client#
Let’s start a new module by running go mod init containerd and then download the ContainerD client package with go get github.com/containerd/containerd, which will create a new pkg folder with the necessary files inside.
Inside the src folder, I’ll create a new file called main.go and create the ContainerD client:
package main
import ( "log"
"github.com/containerd/containerd")
func main() { if err := createAPI(); err != nil { log.Fatal(err) }}
func createAPI () error { client, err := containerd.New("/run/containerd/containerd.sock") defer client.Close()
if err != nil { return err }
return nil}Here we’re basically creating the ContainerD client by passing the path to the .sock file we’ll communicate with.
Criando um contexto#
Since we’re using the socket to communicate via gRPC, we’ll need to create a context for the calls. To do this, we’ll import the github.com/containerd/containerd/namespaces package at the top of our file and create a new context and namespace, very similar to what we did before with crt.
Our imports will look like this:
import ( "context" "log"
"github.com/containerd/containerd" "github.com/containerd/containerd/namespaces")Then we’ll add another line inside the createAPI function:
func createAPI () error { client, err := containerd.New("/run/containerd/containerd.sock") defer client.Close() if err != nil { return err }
ctx := namespaces.WithNamespace(context.Background(), "lsantos")
return nil}Here we’re creating a new namespace called lsantos and passing an empty context.
Baixando uma imagem#
We’ll pull our image the same way we did with the ctr image pull command. Our final function will look like this:
func createAPI () error { client, err := containerd.New("/run/containerd/containerd.sock") defer client.Close() if err != nil { return err }
ctx := namespaces.WithNamespace(context.Background(), "lsantos")
image, err := client.Pull(ctx, "docker.io/khaosdoctor/simple-node-api:latest", containerd.WithPullUnpack) if err != nil { return err } log.Printf("Image %q downloaded", image.Name())
return nil}On your VM, run the command go build ./src/main.go and then ./main, and you should see output saying the image was downloaded.
Criando um container#
To run a container through the programmatic interface, we need to create a valid OCI runtime. This runtime can have several configurations, but ContainerD already has a very good and very useful default runtime, so we’ll use that.
For this, we’ll create a new function called createContainer with the following signature:
func createContainer ( ctx context.Context, client *containerd.Client, image containerd.Image,) (containerd.Container, error) { }To start the container without naming issues, we’ll automatically create a unique hash based on the time for each container. We’ll import the crypto/sha256, encoding/hex, and time libraries and write the following code:
func createContainer ( ctx context.Context, client *containerd.Client, image containerd.Image,) (containerd.Container, error) {
hasher := sha256.New() hasher.Write([]byte(time.Now().String())) salt := hex.EncodeToString(hasher.Sum(nil))[0:8]
containerName := "simple-api-" + salt log.Printf("Creating a new container called %q", containerName)Now we can create our OCI spec. To do this, we’ll import the ContainerD OCI module, and our imports will look like this:
import ( "context" "crypto/sha256" "encoding/hex" "log" "time"
"github.com/containerd/containerd" "github.com/containerd/containerd/namespaces" "github.com/containerd/containerd/oci")And now we create the spec in a separate variable:
func createContainer ( ctx context.Context, client *containerd.Client, image containerd.Image,) (containerd.Container, error) {
hasher := sha256.New() hasher.Write([]byte(time.Now().String())) salt := hex.EncodeToString(hasher.Sum(nil))[0:8]
containerName := "simple-api-" + salt log.Printf("Creating a new container called %q", containerName)
imageSpecs := containerd.WithNewSpec( oci.WithImageConfig(image), oci.WithEnv([]string{"PORT=8080"}), oci.WithHostNamespace(specs.NetworkNamespace), oci.WithHostHostsFile, oci.withHostResolvconf, )Notice that the specs are actually the configurations of the image we want to run, so we’re passing a new configuration called oci.WithEnv, where we pass the environment variable string.
In addition, we have WithHostNamespace which sets the container’s namespace to be the same as ours, and we also have WithHostHostsFile and WithHostResolvconf which mount our /etc/hosts and /etc/resolv.conf files in the container so we can access the container from outside, as we did with --net-host.
In fact, the source code of
crtdoes the same thing we’re doing now when a container is initialized with the--net-hostflag
After this, we’ll finish the function by creating the container. The final function would look like this:
func createContainer ( ctx context.Context, client *containerd.Client, image containerd.Image,) (containerd.Container, error) {
hasher := sha256.New() hasher.Write([]byte(time.Now().String())) salt := hex.EncodeToString(hasher.Sum(nil))[0:8]
containerName := "simple-api-" + salt log.Printf("Creating a new container called %q", containerName)
imageSpecs := containerd.WithNewSpec( oci.WithImageConfig(image), oci.WithEnv([]string{"PORT=8080"}), oci.WithHostNamespace(specs.NetworkNamespace), oci.WithHostHostsFile, oci.withHostResolvconf, )
container, err := client.NewContainer( ctx, containerName, containerd.WithNewSnapshot(containerName + "-snapshot", image), imageSpecs, ) if err != nil { return nil, err }
log.Printf("Created new container %q", containerName) return container, nil}Then we call the function in our main function, right after downloading the image:
container, err := createContainer(ctx, client, image)if err != nil { return err}defer container.Delete(ctx, containerd.WithSnapshotCleanup)We’re removing the container right after its execution, similar to the --rm we used. The complete function looks like this:
func createAPI () error { client, err := containerd.New("/run/containerd/containerd.sock") defer client.Close() if err != nil { return err }
ctx := namespaces.WithNamespace(context.Background(), "lsantos")
image, err := client.Pull(ctx, "docker.io/khaosdoctor/simple-node-api:latest", containerd.WithPullUnpack) if err != nil { return err } log.Printf("Image %q downloaded", image.Name())
container, err := createContainer(ctx, client, image) if err != nil { return err } defer container.Delete(ctx, containerd.WithSnapshotCleanup)
return nil}You can see everything in action through the same commands go build ./main.go and sudo ./main:

Tasks e containers#
An important segregation made in ContainerD is between containers and tasks.
While a container is an object with various metadata and allocated resources, a task is an actual process running on the system. Every task must be removed after its execution, but containers can be reused and updated multiple times.
We’ll create a new function createTask so we can capture all the container’s IO and display it in our terminal:
func createIOTask (ctx context.Context, container containerd.Container) (containerd.Task, error) { task, err := container.NewTask(ctx, cio.NewCreator(cio.WithStdio)) if err != nil { return nil, err } return task, nil}What we’re doing here is importing the github.com/containerd/containerd/cio library to create a link that will allow all output from our container to go to our main.go file. We’ll call it in our main function right after creating the container:
task, err := createIOTask(ctx, container)if err != nil { return err}defer task.Delete(ctx)Right now, our task is in created status, meaning it’s created but not started. We’ll start it, but we need to be careful to always wait for it to finish before we can kill it. Let’s add these lines to our main function, below where we call defer task.Delete:
exitStatus, err := task.Wait(ctx) if err != nil { log.Println(err) }
if err := task.Start(ctx); err != nil { return err }This will ensure that we wait for the task to finish before we can remove it.
Matando o processo#
Since we’re running a process that runs indefinitely (a long-running process), we’ll give it time to execute and show its logs, as well as time for us to access our API and verify everything.
So far, our function looks like this:
func createAPI () error { client, err := containerd.New("/run/containerd/containerd.sock") defer client.Close() if err != nil { return err }
ctx := namespaces.WithNamespace(context.Background(), "lsantos")
image, err := client.Pull(ctx, "docker.io/khaosdoctor/simple-node-api:latest", containerd.WithPullUnpack) if err != nil { return err } log.Printf("Image %q downloaded", image.Name())
container, err := createContainer(ctx, client, image) if err != nil { return err } defer container.Delete(ctx, containerd.WithSnapshotCleanup)
task, err := createIOTask(ctx, container) if err != nil { return err } defer task.Delete(ctx)
exitStatus, err := task.Wait(ctx) if err != nil { log.Println(err) }
if err := task.Start(ctx); err != nil { return err }
return nil}Let’s add the following lines before the return nil:
time.Sleep(10 * time.Second)
if err := task.Kill(ctx, syscall.SIGTERM); err != nil { return err}
status := <-exitStatusexitCode, _, err := status.Result()if err != nil { return err}
log.Printf("%q was terminated with status: %d\n", container.ID(), exitCode)We’re waiting 10 seconds (you can increase this time if necessary) before sending a task.Kill command, then we’re waiting for the call status to be returned via a channel so we can get the result and display it on screen.
Concluindo#
We can now run our container normally. First, we can use go build ./main.go and then sudo ./main.go to execute the command and run the containers:
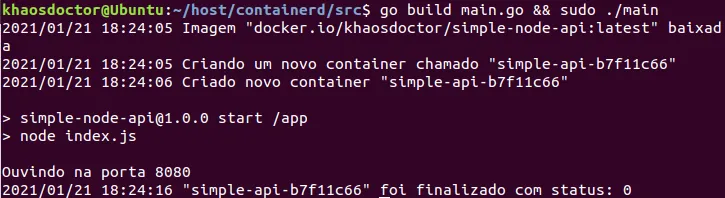
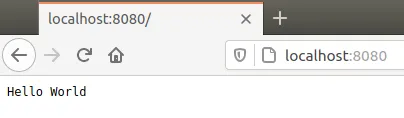
If we try to access the API through the browser within 10 seconds, we’ll get the same result we got before:
And that’s how we can manipulate containers using runc and containerd programmatically and learn a bit more about how the container ecosystem works!
Our final file looks like this:
package main
import ( "context" "crypto/sha256" "encoding/hex" "log" "syscall" "time"
"github.com/containerd/containerd" "github.com/containerd/containerd/cio" "github.com/containerd/containerd/namespaces" "github.com/containerd/containerd/oci" "github.com/opencontainers/runtime-spec/specs-go")
func main() { if err := createAPI(); err != nil { log.Fatal(err) }}
func createAPI () error { client, err := containerd.New("/run/containerd/containerd.sock") defer client.Close() if err != nil { return err }
ctx := namespaces.WithNamespace(context.Background(), "lsantos")
image, err := client.Pull(ctx, "docker.io/khaosdoctor/simple-node-api:latest", containerd.WithPullUnpack) if err != nil { return err } log.Printf("Image %q downloaded", image.Name())
container, err := createContainer(ctx, client, image) if err != nil { return err } defer container.Delete(ctx, containerd.WithSnapshotCleanup)
task, err := createIOTask(ctx, container) if err != nil { return err } defer task.Delete(ctx)
exitStatus, err := task.Wait(ctx) if err != nil { log.Println(err) }
if err := task.Start(ctx); err != nil { return err }
time.Sleep(10 * time.Second)
if err := task.Kill(ctx, syscall.SIGTERM); err != nil { return err }
status := <-exitStatus exitCode, _, err := status.Result() if err != nil { return err } log.Printf("%q was terminated with status: %d\n", container.ID(), exitCode)
return nil}
func createContainer ( ctx context.Context, client *containerd.Client, image containerd.Image,) (containerd.Container, error) {
hasher := sha256.New() hasher.Write([]byte(time.Now().String())) salt := hex.EncodeToString(hasher.Sum(nil))[0:8]
containerName := "simple-api-" + salt log.Printf("Creating a new container called %q", containerName)
imageSpecs := containerd.WithNewSpec( oci.WithDefaultSpec(), oci.WithImageConfig(image), oci.WithEnv([]string{"PORT=8080"}), oci.WithHostNamespace(specs.NetworkNamespace), oci.WithHostHostsFile, oci.WithHostResolvconf, )
container, err := client.NewContainer( ctx, containerName, containerd.WithNewSnapshot(containerName + "-snapshot", image), imageSpecs, ) if err != nil { return nil, err }
log.Printf("Created new container %q", containerName) return container, nil}
func createIOTask (ctx context.Context, container containerd.Container) (containerd.Task, error) { task, err := container.NewTask(ctx, cio.NewCreator(cio.WithStdio)) if err != nil { return nil, err } return task, nil}Footnotes#
-
The code you’ll see below can be found in this repository on my GitHub ↩