A Deep Dive into Container Images - Part 1
Part 1 of 3 of the series A deep dive into container images
Recently, I read a series of articles by Scott Coulton on Medium about how to choose base images for your containers. I decided to write these articles so that other people can understand how to better choose and get started creating their containers using Docker the right way!
Base Images#
When we start creating our images, the first thing we need to think about is: Which base image will we use for our application?
For example, I create many images that use Node.js, so my natural choice would be to use a base image from Node itself, like node:14 which is an official image available on DockerHub.
However, I could easily create my own image with Node installed as a tool instead of having it natively from my base image. To do this, I just need to choose another base image that contains only the operating system. We could use the Debian image and then create a Dockerfile like the following:
FROM debian:busterRUN sudo apt update \ && sudo apt upgrade -y \ && sudo apt install -y curl \ && curl -sL https://deb.nodesource.com/setup_14.x | bash - \ && sudo apt install -y nodejsThis is not very different from what is done in the official image. But are we creating an image that meets the basic requirements to be used by other people?
What I mean with this introduction is that we have to think far beyond the base image. Any Docker image needs to be designed to achieve the best scalability and usability possible. This is accomplished with the following requirements:
- The image size is small enough
- The application that will run inside the image has good performance
- Security is guaranteed within the base image
To tackle all aspects, we will work with compiled languages, like Golang, in the next part of this article and, in the last part, we will work with dynamic languages, like JavaScript or Python.
Types of base images#
To let the reader make their own choice, I won’t say if one operating system is better than another, after all it’s a completely personal choice. Instead, we will work with three types of naming conventions:
fullimagesslimimagesalpineimages
Full Images#

full images (or complete images) are images that contain the full extent of an operating system. For example, a debian-full image is an image that has the complete Debian Linux distribution, with all packages and modules loaded.
This type of image is the best type to start with and, probably, the simplest way to get an application running. This is because they have all the tools and packages already installed by default. In this article we will only compare the images and will not worry much about the applications we will run inside them.
One of the major problems with full images is that, because they have many packages installed by default, it means there are many packages with known vulnerabilities that also come installed by default. This opens the door for attacks to occur.
Docker Hub itself has a vulnerability scanning tool that can be used directly from the website, through the Tags tab. As shown in the image below.
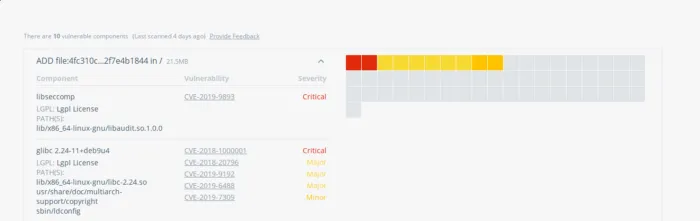
As you can see, the image itself has vulnerabilities that you are inheriting even before deploying your code.
Slim Images#

A slim image is a slightly smaller image. Every slim image only has the packages necessary for the operating system to work. You are expected to install all the extra packages for your application to function. Currently, only Debian has a slim image.
One of the direct benefits of using slim images is that, by having fewer packages, you have fewer dependencies that can be subject to vulnerabilities. See an example.
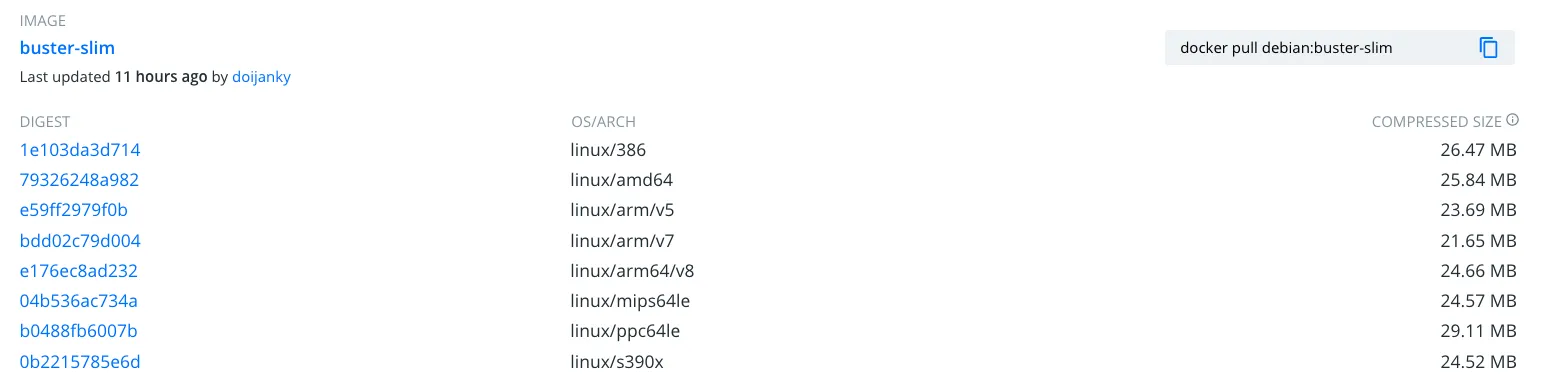
Another interesting benefit is that, precisely because they are cleaner, slim images are much smaller in size than a full image. In more extreme cases, a slim image can be up to 50% smaller than a full image. See the example of comparing debian:buster with debian:buster-slim.
Now see the size of the complete image
Note that if we take the amd64 architecture, which is the most common for 64-bit processors, and compare the full versions with 48.06MB against 25.84MB of the same image, but in the slim version. This is a reduction of 47% in image size. All of this just by removing unused packages.
Alpine Linux Images#
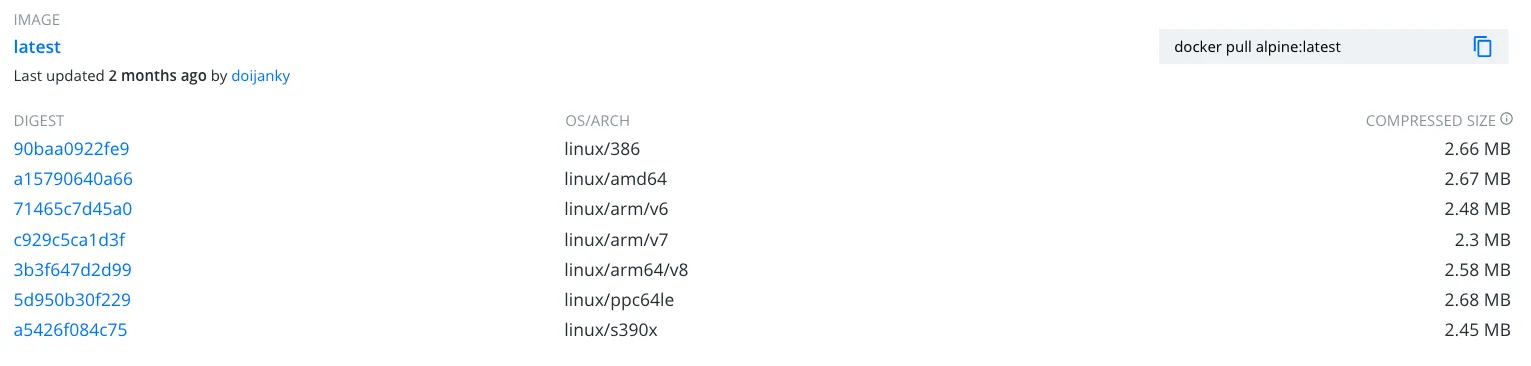
Alpine Linux images are the most optimized type of image possible. This type of OS was built from scratch to be a natively container-ready operating system. The main difference between this type of image and a traditional image is that this system does not use glibc. Alpine depends on another library called musl libc. Moreover, by default, Alpine only comes with the base packages installed, meaning anything else your application needs, you will have to install manually.
This may seem a bit complicated, but see how we reduced the number of vulnerabilities just by reducing packages. Notice that there are no critical vulnerabilities.
Furthermore, an alpine image has less than 6MB in total size. In the case of newer images, this size can reach just over 2MB. This is a reduction of over 95% in overall image size.
The downside of working with Alpine images is that they are a completely different system. You will need to learn how to work with their native package manager. Since they don’t use standard Linux libraries, most systems will probably need to be recompiled using Alpine’s tools.
Scratch Images#

Finally, let’s take a look at scratch type images. When we use scratch as the base image, we’re telling Docker that we want the next command in our Dockerfile to be the first layer of our filesystem inside that image.
This means we have no package manager, not even packages. Just an empty filesystem. You can start using FROM scratch, since this is a reserved namespace on DockerHub and has no vulnerabilities or installed packages.
FROM scratchADD rootfs.tar.xz /CMD ["bash"]Most operating system images start this way, as most of them are considered empty images that start from absolute zero.
Conclusion#
We will explore more about images and put these concepts into practice in the next articles by writing an application in Go.
Stay tuned for more updates!